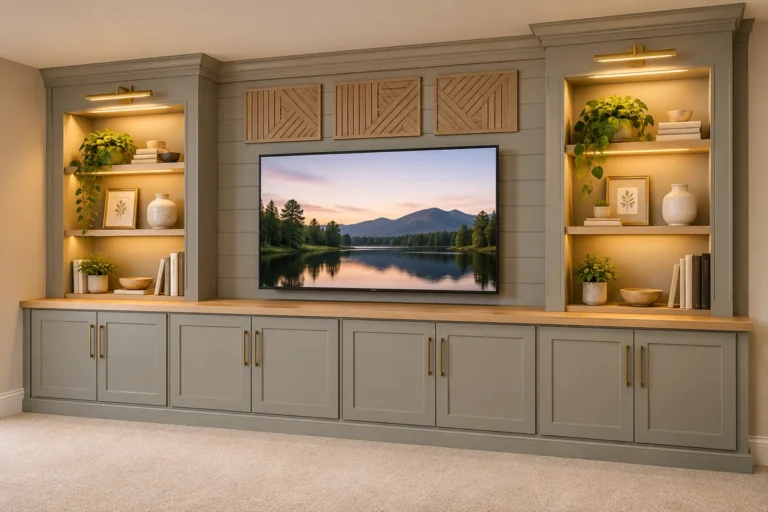

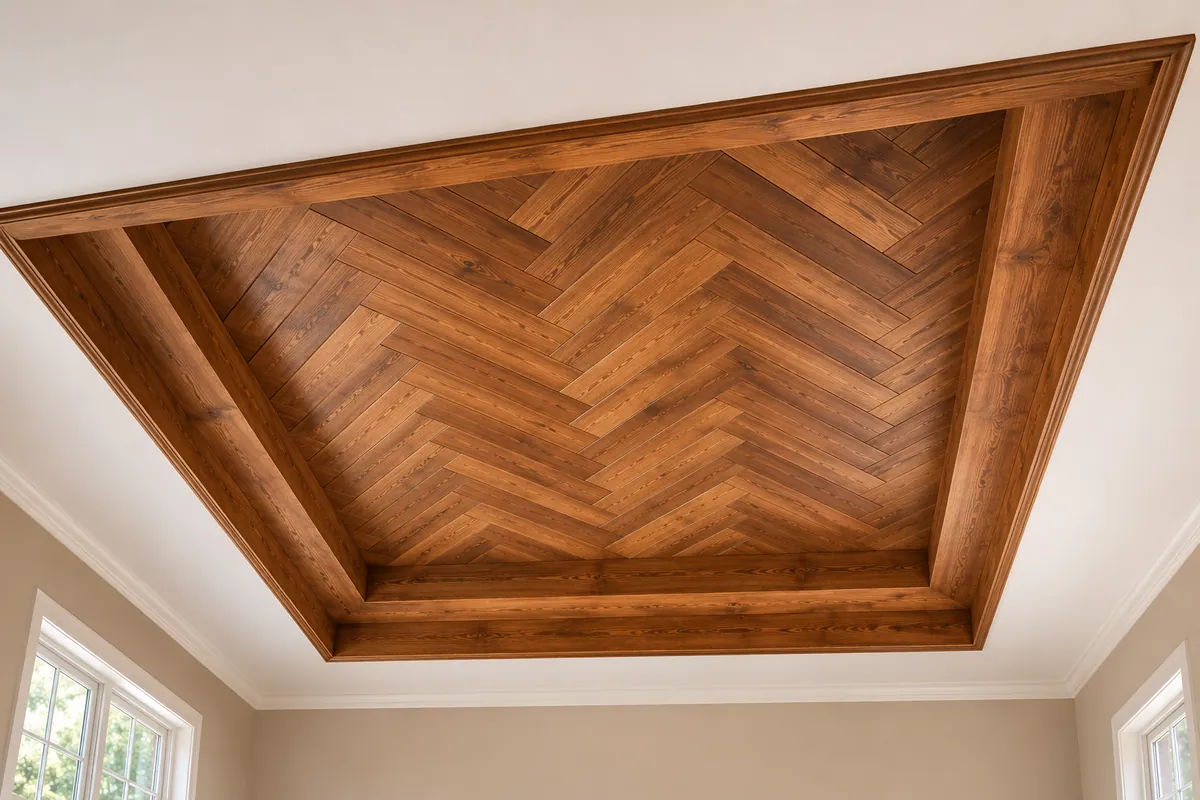
A Herringbone Double Tray Ceiling brings warmth, texture, and architectural detail to a room by combining angled wood planks with a stepped ceiling frame. Instead of leaving the ceiling as a plain painted surface, the design turns it into a feature that feels connected to the woodwork and craftsmanship below.
What makes this project interesting is the relationship between the different elements. The herringbone pattern creates movement across the center, while the wood-wrapped tray edges provide a clean, structured border. Together, they create a detailed ceiling without needing additional decorative features.
Before getting started, here is a brief summary of the project:
This herringbone double tray ceiling project is a moderate-to-advanced woodworking and finishing task that is well suited to DIYers with some experience, or to those working with a contractor. The full process includes planning and measuring the existing ceiling, designing and laying out the wood pattern, cutting and preparing the decorative materials, assembling the backing, installing the herringbone field, and finishing with coordinated trim. Depending on the size and complexity, you should allow approximately 5-8 full weekends for a typical installation, as well as time to test finishes and adapt for unique site conditions.
In this guide, I’ll explain how to plan the ceiling layout, choose the wood and finishing materials, prepare the herringbone pieces, and coordinate the backing and perimeter trim. We’ll work from a dimensioned reference design, with practical checks along the way so you can adapt the measurements to your own ceiling before making permanent changes.
Why a Herringbone Double Tray Ceiling Changes the Room
The first thing you notice about this ceiling is the direction of the wood. Instead of running all the boards parallel, the center uses a traditional 90-degree herringbone pattern, with rectangular pieces meeting at right angles to form a continuous zigzag arrangement.
That change in direction gives the ceiling a sense of movement without relying on complicated decorative molding. The natural wood grain offers another layer of detail, especially when the individual pieces have slightly different grain patterns.
Around the herringbone field, the two tray levels create depth. Each step frames the center and creates a clear transition between the patterned wood and the surrounding ceiling. Wrapping the vertical returns in matching wood helps connect the separate levels visually.
The perimeter trim is just as important as the pattern itself. A continuous border gives the cut ends of the herringbone pieces a finished appearance and makes the entire arrangement look intentional.
This combination works particularly well with a library wall because the two features offer different types of detail. Bookcases emphasize straight vertical and horizontal lines, while the ceiling introduces diagonal movement.
I prefer keeping the rest of the ceiling treatment fairly restrained. With the herringbone pattern, natural grain, and stepped border already providing plenty of interest, additional ornamental pieces could make the design feel unnecessarily busy.
The goal is a ceiling that looks carefully planned from every angle, with the patterned field and surrounding trim reading as one architectural feature.
Check Your Existing Ceiling Before Planning the Woodwork
Before choosing plank sizes or ordering plywood, look closely at the ceiling you actually have.

This design is easiest to plan around an existing double-tray ceiling with accessible surfaces suitable for decorative finishing. If your room has a flat ceiling, adding the two recessed tray levels will require a separate building project, which involves framing and finishing new drop-down sections to create the stepped effect.
This procedure usually includes installing new ceiling joists or furring strips, adding drywall or paneling to form the tray shapes, and making sure all structural changes are safely anchored. Constructing the trays will also affect ceiling height and may demand adjustments to lighting or HVAC features. If this scope is new to you, think about consulting a qualified contractor or refer to a step-by-step resource on building tray ceilings before proceeding with the decorative woodwork.
The decorative wood treatment should not be confused with the structural framing that supports it.
What to Measure and Inspect
Start by making a simple sketch of the room and recording the ceiling boundaries.
Step 1: Measure the overall ceiling. Use a tape measure or suitable laser measuring tool to record the length and width. Check the measurements in more than one location because the walls may not be perfectly parallel.
Step 2: Measure the tray levels. Record the width of each horizontal border, the height of each vertical return, and the size of the recessed center. Look for differences from one side of the room to the other.
Step 3: Check the ceiling surfaces. Look for visible damage, uneven finishes, moisture staining, or loose material. Identify the construction and condition of the surfaces before deciding how decorative panels could be retained.
Step 4: Identify possible obstructions. Record any light fixtures, vents, access panels, or other features that could interrupt the proposed wood layout. Their locations may affect the design and must be resolved before cutting or installation.
Step 5: Check the supporting structure. Establish where suitable supports are located and whether the proposed overhead assembly can be installed using a properly designed mechanical attachment system.
An existing ceiling finish alone does not demonstrate that it can support decorative plywood, backing panels, and trim.
When the Project Needs Professional Involvement
If the work entails creating new tray levels, modifying ceiling framing, changing electrical fixtures, or designing an overhead attachment system, have the relevant work assessed by a qualified professional.
Before beginning any structural or electrical work, always check your municipal building codes and permit requirements to ensure that your project will be safe and up to code. Executing these steps protects you against costly or unsafe mistakes and ensures the finished project fulfills all necessary safety standards.
The project drawings establish the decorative arrangement and component geometry. They do not establish the load capacity of an existing ceiling or approve a particular screw spacing, fastener, or mounting method.
Once the ceiling conditions and installation approach have been established, you can plan the woodwork around reliable dimensions rather than making adjustments after the components have been cut.
Lay Out the Two Tray Levels and Center Herringbone Field
A balanced herringbone ceiling begins with the position of the central field. If the decorative rectangle is off-center or the perimeter bands vary unexpectedly, the repeated pattern can make those differences more noticeable.

For this project, the reference drawing uses a rectangular ceiling measuring 14 × 16 feet (4267.2 × 4876.8 mm). These are illustrative design dimensions rather than measurements from an existing room.
The layout uses two nested rectangular boundaries to establish the tray arrangement.
Establish the Perimeter and Center Field
The approved reference design uses the following dimensions:
| Ceiling element | Reference dimensions |
|---|---|
| Overall ceiling | 168 × 192 in (4267.2 × 4876.8 mm) |
| First tray boundary | 144 × 168 in (3657.6 × 4267.2 mm) |
| Central herringbone field | 120 × 144 in (3048 × 3657.6 mm) |
| Width of each perimeter band | 12 in (304.8 mm) |
| First tray elevation change | 4 in (101.6 mm) |
| Second tray elevation change | 3 in (76.2 mm) |
| Total modeled elevation change | 7 in (177.8 mm) |
The two perimeter bands create a consistent visual frame around the central rectangle.
The exact band widths can be adapted to another ceiling, but they should be calculated as part of the whole arrangement. An oversized border can make the center pattern feel too small, while a narrow border may weaken the appearance of the stepped design.
For the reference layout, the herringbone field occupies a central area of 120 square feet (approximately 11.15 square meters).
Transfer the Measurements to a Usable Layout
Step 1: Establish the centerlines. Mark the midpoint of the overall ceiling width and length on your drawing. Use these reference lines to position the center field symmetrically.
Step 2: Draw the first tray boundary. Measure inward from the overall ceiling edges using the approved border dimensions or the recalculated values for your room.
Step 3: Establish the second boundary. Repeat the process to define the herringbone field. Compare opposite sides to confirm that the field is centered as intended.
Step 4: Record the vertical changes. Use a section drawing to identify where the horizontal surfaces meet the wood-wrapped returns. This is especially useful when the two tray levels have different heights.
Step 5: Check the pattern clearance. Account for the planned perimeter termination before generating the final plank cutting layout.
The reference design includes a provisional 1/8-inch (3.175 mm) concealed field-edge allowance. This must be checked against the actual trim arrangement, material movement considerations, and installation method before fabrication.
A dimensioned ceiling plan helps you establish the rectangular boundaries and layout references. The 3D model is useful to understand how the two stepped levels, backing panels, and decorative wood surfaces relate to one another.

At this point, focus on getting the overall proportions right. The detailed herringbone cutting layout comes next, after the field dimensions have been established.
Choose the Wood, Trim, Fasteners, and Finish System
The materials for this ceiling have different jobs. Some create the visible pattern, others form the decorative backing and trim, and a separate attachment system must safely retain the assembly overhead.

Choosing the materials by their function makes it easier to prepare the pieces and understand where each product belongs.
Materials and Tools
Here are the principal materials used in the reference design.
| Material | Purpose |
|---|---|
| Columbia PureBond Birch plywood, nominal 1/4 in | Herringbone pieces and decorative wrapped surfaces |
| Columbia PureBond Birch plywood, nominal 1/2 in | Continuous backing field |
| RELIABILT Select Pine boards, nominal 1 × 3 in | Perimeter trim and wood detailing |
| Titebond Original Wood Glue | Nonstructural wood-to-wood bonding |
| Grip-Rite 18-gauge finishing brads | Candidate supplementary decorative retention |
| GRK R4 #9 × 2-1/2 in screws | Candidate fastener; overhead suitability not established |
| Minwax Oil-Based Pre-Stain Wood Conditioner | Preparing bare wood for staining |
| Minwax Wood Finish Early American 230 | Medium-brown wood stain |
| Minwax Polycrylic Clear Satin | Protective clear finish |
| DAP Plastic Wood Professional Natural | Appropriate wood surface filling |
| DAP Alex Plus White | Suitable paintable transition joints |
For measuring and fabrication, prepare a tape measure, straightedge, square, marking pencil, suitable wood-cutting equipment, clamps, sanding materials, clean cloths, and the protective equipment required for the tools and finishing products.
You will also need a stable work surface large enough to arrange and check the decorative pieces before assembly.
The quantities of panels, boards, fasteners, and finishing supplies depend on the final ceiling dimensions and cutting arrangement. The reference design includes preliminary material estimates, but they are not a final purchase list.
Sample Material List and Cost Estimate
For budgeting purposes, here is a rough sample material list and estimated costs for a standard rectangular ceiling measuring 14 x 16 feet (4267.2 x 4876.8 mm), with a central herringbone field and two perimeter tray levels:
Materials:
– Decorative herringbone field: 5 sheets of 1/4-inch (actual 0.188-inch) birch plywood
– Backing panels: 4 sheets of 1/2-inch (actual 0.453-inch) birch plywood
– Perimeter trim: 8 pieces of 1 x 3-inch RELIABILT Select Pine boards, each 8 feet long
– Wood glue (Titebond Original): 1 bottle (16 ounces)
– Finishing brads: 1 package (approx. 500 count)
– GRK screws (candidates): 1 to 2 boxes, depending on final fastening requirements
– Wood finish: Minwax Pre-Stain Conditioner (1 quart), Minwax Wood Finish in Early American 230 (1 quart), Minwax Polycrylic Clear Satin (1 quart)
– Wood filler and caulk: 1 small container each (as needed)
Approximate Costs (as of early 2024):
– Birch plywood (1/4-inch, 4×8-ft): $45 per sheet x 5 = $225
– Birch plywood (1/2-inch, 4×8-ft): $62 per sheet x 4 = $248
– Pine trim boards (1 x 3-inch, 8-ft): $11 each x 8 = $88
– Wood glue: $8
– Brads: $7
– GRK screws: $18
– Wood finish set: $45 (all products)
– Wood filler/caulk: $12
Estimated subtotal for materials: $651
Additional supplies such as sandpaper, brushes, or personal protective equipment may add to this amount. Labor, tools, or professional installation are not included in this estimate. Prices vary by region and supplier, so check your local sources and update the estimate according to actual product availability.
Use this sample list as a starting point for planning and adjust the quantities if your ceiling dimensions or design details differ.
Wood Panels and Perimeter Trim
The herringbone design uses Columbia PureBond Birch plywood, with a nominal thickness of 1/4 inch. The selected panel’s published actual thickness is 0.188 inches (approximately 4.78 mm).
That distinction matters when planning the decorative layer, particularly where the patterned surface meets the surrounding trim.
The backing is based on a separate nominal 1/2-inch PureBond Birch panel with a published actual thickness of 0.453 inches (approximately 11.51 mm). This panel provides a continuous decorative receiving surface in the reference model, but its use overhead must be evaluated as part of the actual installation system.
For the border, the selected RELIABILT Select Pine board is nominally 1 × 3 inches, with an actual cross-section of approximately 0.75 × 2.5 inches (19.05 × 63.5 mm).
The pine trim creates a defined perimeter and helps give the stepped ceiling a finished edge. Its visible face and joints should be coordinated with the herringbone pieces rather than designed independently.
Attachment Materials and Their Limitations
The reference material selection includes Titebond Original Wood Glue, finishing brads, and a GRK screw candidate. These should not be treated as a complete overhead fastening specification.
Wood glue can help with appropriate nonstructural wood joints, but Titebond Original’s not intended for structural or structural load applications. Finishing brads similarly cannot be assumed to provide the necessary overhead retention.
The actual installation requires a mechanically secure attachment approach designed for the ceiling substrate, component weights, and site conditions. The proposed screws remain candidates until their suitability and the complete fastening arrangement have been established.
This is a decision to settle before any overhead assembly begins, not something to improvise while installing finished wood.
Wood Stain, Clear Coat, and Finishing Supplies
The selected finish combines Minwax Oil-Based Pre-Stain Wood Conditioner with Minwax Wood Finish in Early American 230, followed by Minwax Polycrylic Clear Satin.
Early American provides the warm brown color direction chosen for the ceiling, while the satin topcoat gives the finished wood a restrained sheen.
Because the design uses both birch and pine, prepare separate samples before treating the full batch of pieces. The two woods can absorb stain differently, even when the same product is applied.
The finishing sequence is to prepare the bare wood, apply the conditioner as directed, stain the surface, allow the stain to dry sufficiently, and then apply the compatible clear finish according to its application and recoating instructions. The selected Polycrylic system calls for adequate drying after compatible oil-based stain; the manufacturer’s guidance generally specifies at least 24 hours before the clear coat.
Wood filler can be used for appropriate small surface imperfections before the final finish. Paintable white caulk belongs only at suitable painted transitions, not across exposed stained-wood joints.
Keeping these finishing roles separate is important. It helps preserve the natural appearance of the herringbone pieces while allowing the surrounding painted surfaces, where present, to have clean transitions.
With the material system established, the next fabrication task is to lay out and cut the individual herringbone pieces so their repeating angles fit the center field accurately.
Mark and Cut the Herringbone Pieces
The herringbone pattern is the part of this ceiling that needs the most careful preparation. Each plank is relatively simple, but small cutting errors can become noticeable when hundreds of pieces meet in a repeating arrangement. For the most precise results, use a sharp, high-quality saw blade and measure each cut twice before proceeding.
Keeping your cutting equipment well maintained and always marking from the same reference edge will help avoid gradual discrepancies across the set. When possible, make a jig or stop-block for repetitive cuts to ensure all pieces are exactly the same size.
Pay close attention to saw kerf width, and account for it in your layout, as minor differences can add up over many pieces. Avoid rushing the process and frequently check the squareness of your cuts. If you notice slight variations, group and orient similar pieces together rather than scattering potential irregularities throughout the pattern.
Taking the extra time for attentive dry-fitting and layout will help avoid misalignment and minimize visible gaps, giving you a more professional finished look.
The most effective method is to establish the pattern on a flat work surface, check its dimensions, and complete the boundary cuts before moving on to decorative assembly.
Establish the Repeating Pattern
The reference design uses rectangular herringbone pieces measuring 3 × 18 inches (76.2 × 457.2 mm).

These pieces are arranged in a traditional 90-degree herringbone pattern. The short end of one piece meets the long edge of another, creating alternating directions across the ceiling.
Unlike a chevron pattern, the ends are not cut into matching points. The rectangular pieces keep their square ends through the main field, with angled or shortened pieces introduced where the pattern meets the perimeter.
Here is the basic preparation sequence.
Step 1: Check the plywood thickness. Confirm the actual thickness of the decorative plywood before cutting. The reference panel measures 0.188 inches (approximately 4.78 mm), but the material delivered for your project should be checked independently.
Step 2: Establish a cutting reference. Use a straightedge and square to mark the plank width and length. Keep the reference edge consistent so differences in the plywood sheet do not accumulate across the pieces.
Step 3: Cut a small sample group. Prepare several pieces using the approved 3 × 18-inch dimensions. Check their width, length, and squareness before continuing.
Step 4: Arrange the sample pieces. Lay them on a stable, flat surface in the intended herringbone pattern. Check how the short ends meet the adjacent long edges and whether the repeating arrangement continues aligned.
Step 5: Confirm the cutting method. Account for the saw kerf and the condition of the cut edges before preparing the remaining pieces. Use suitable support and guarding for the cutting equipment.
A sample arrangement is useful because a plank can measure correctly on its own yet still create visible alignment problems when placed against other pieces.
Make and Identify the Perimeter Cuts
The central herringbone field in the reference design measures 120 × 144 inches (3048 × 3657.6 mm).
The approved digital layout contains 355 piece positions, divided into 258 whole pieces and 97 boundary-cut pieces.
Loading interactive drawing…
These figures describe the specific modeled pattern. They are not a universal cutting list for every ceiling.
The boundary pieces are especially important because they create the straight rectangular edge that will eventually be covered by the perimeter treatment.

Step 1: Mark the field boundary. Use the measured center-field dimensions to establish a rectangular cutting boundary on the layout.
Step 2: Extend the herringbone arrangement across the boundary. Keep the established pattern orientation rather than changing the angle of individual planks to make them fit.
Step 3: Identify the intersecting pieces. Mark each plank that crosses the perimeter and determine the portion required inside the field.
Step 4: Transfer the cut shapes. Use the dimensioned pattern drawing to establish the cuts, permitting the final approved edge treatment.
Step 5: Label the pieces. Mark the back of each boundary piece with a location or sequence reference so it can be returned to the correct position.
Do not assume all 97 boundary pieces have the same shape. Their lengths and cut edges depend on where the repeating pattern intersects the rectangle.
The preliminary material planning allows five 4 × 8-foot plywood sheets for fabrication of the decorative field, with an additional sheet allowed for spare material. However, that estimate is based on an idealized cutting yield, not a fully optimized workshop nesting plan.
Before purchasing or cutting the full batch, reconcile the cutting layout with the available sheet dimensions, kerf width, defects, usable offcuts, and any pieces that may require replacement.
Check the Pattern Before Assembly
Once the sample pieces and boundary cuts have been prepared, arrange the decorative field on a flat surface or in manageable reference sections.
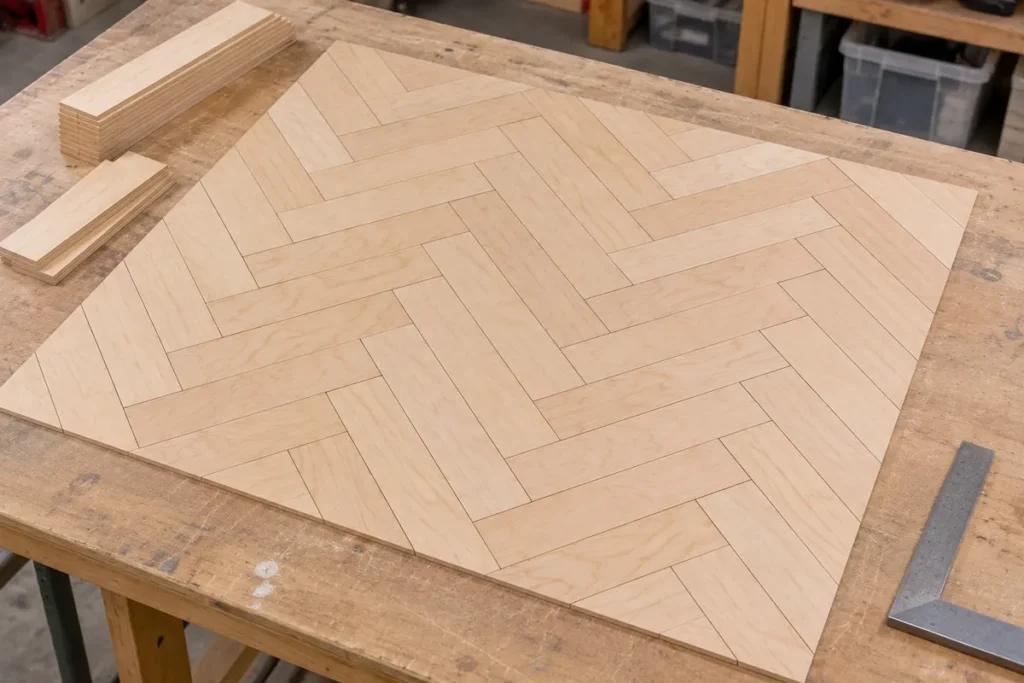
Check the direction of the planks against the drawing. The repeated angles should remain consistent, and the pattern should continue fluently from one section into the next.
Pay particular attention to three things:
- Joint alignment: The short ends should meet the corresponding long edges without creating unintended gaps.
- Pattern direction: Every section must follow the same orientation established in the layout.
- Perimeter termination: Boundary pieces should fit within the planned field without forcing adjacent pieces out of alignment.
Also inspect the cut edges for splintering or damage. Small defects may be easier to correct before finishing than after the pieces are assembled.
When the dry-fit arrangement corresponds to the approved layout, keep the pieces organized in their installation or assembly order.
Test the Wood Stain and Prepare the Pieces for Finishing
A wood ceiling covers a large visible area, so the finish matters just as much as the pattern.
The selected combination of birch plywood and pine trim provides the natural wood appearance shown in the reference design. However, the two materials do not necessarily absorb stain in the same way.
Testing the finish before treating the full batch helps prevent an obvious color difference between the herringbone center and its surrounding frame.

Step 1: Prepare representative samples. Cut or reserve small pieces of the actual birch plywood and pine trim. Include any exposed plywood edges or end-grain conditions that will remain visible in the finished design.
Step 2: Sand the sample surfaces. Use a suitable sanding sequence for each material, taking care not to wear through the thin decorative face of the plywood. Remove sanding dust before applying the finishing products.
Step 3: Apply the wood conditioner. Use the selected Minwax Oil-Based Pre-Stain Wood Conditioner on the bare wood, following its application and timing instructions. Work with the grain where practical and remove excess material as directed.
Step 4: Test the stain. Apply Minwax Wood Finish Early American 230 using the manufacturer’s recommended method. Wipe away excess stain according to the product instructions, then compare the dried samples.
Step 5: Evaluate both materials together. Place the stained birch and pine samples side by side under lighting similar to the room where the ceiling will be installed.
Step 6: Test the protective topcoat. Once the stain has dried sufficiently, apply Minwax Polycrylic Clear Satin according to its instructions. For this selected finishing system, allow at least 24 hours after the oil-based stain before applying the clear coat, subject to the manufacturer’s actual drying conditions and guidance.
The clear coat may slightly change the appearance of the stained wood, so judge the samples after the complete finish system has been applied.
If the birch and pine samples look noticeably different, adjust the finishing approach on new test pieces rather than assuming another coat will automatically make them match.
Once the samples are satisfactory, prepare the remaining decorative pieces.
Work in organized batches, keeping the backs labeled and avoiding unnecessary buildup on edges that must fit against neighboring pieces.
Apply the finish using the product’s supported application method, maintain suitable ventilation and protective equipment, and allow the required drying and curing periods before handling or assembly.
For areas that may be difficult to reach later, such as exposed portions of the wrapped returns, completing the appropriate finishing work before final installation can make the process easier.
Avoid filling every joint between herringbone pieces. Their separate edges are part of the intended visual pattern, and unnecessary filler can reduce the definition of the design.
The goal is a consistent warm wood appearance that preserves the individual planks and their natural grain.
Prepare the Tray Surfaces and Coordinate the Backing Panels
The decorative herringbone pieces need a properly prepared receiving surface. In the reference design, a continuous plywood backing field sits behind the patterned wood.
The 3D model represents this backing using six separate panel segments, arranged to cover the central field.
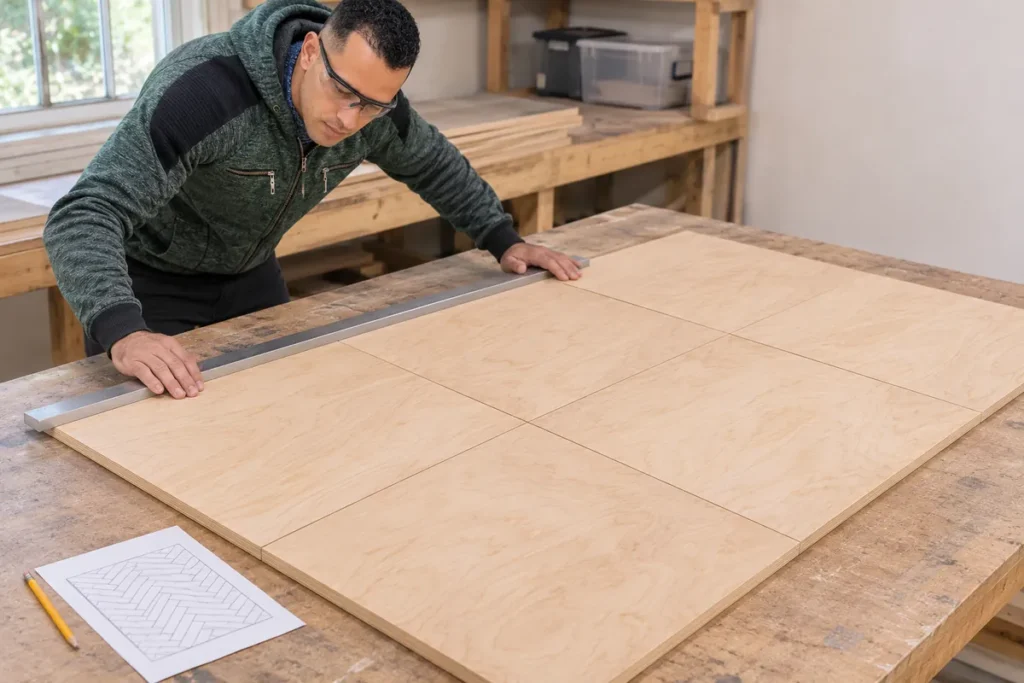
These are modeled construction components, not six full plywood sheets. The preliminary material schedule allows four nominal 4 × 8-foot sheets of backing plywood, subject to the final cutting layout.
The purpose of the backing is to create a continuous surface for organizing and supporting the decorative pattern as part of an independently approved installation system.
Check the Backing Arrangement
Before preparing the backing, compare the available panel dimensions with the center-field layout.
The selected Columbia PureBond Birch backing is nominally 1/2 inch thick, with a published actual thickness of 0.453 inches (approximately 11.51 mm).
Combined with the 0.188-inch decorative plywood, the two wood layers have a total nominal modeled thickness of approximately 0.641 inches (16.28 mm) before adhesive or other interface allowances.
That thickness matters where the finished herringbone field approaches the tray returns and perimeter trim.
Step 1: Review the backing layout. Identify the six modeled segments and their locations within the center field. Use the drawing to understand where panel joints occur.
Step 2: Check the actual receiving surfaces. Confirm flatness, surface condition, support locations, and any features that interrupt the proposed panel arrangement.
Step 3: Prepare the backing pieces. Transfer the approved dimensions to the plywood and cut the segments using a suitable supported cutting setup.
Step 4: Dry-fit the segments. Arrange the pieces in their intended positions without irreversibly attaching them. Check the overall rectangle, adjoining edges, and perimeter termination.
Step 5: Check the decorative layer against the backing. Confirm that the herringbone pieces will have a consistent receiving surface and that the backing joints do not create unintended steps beneath the pattern.
The backing layout should also be coordinated with the first rows of herringbone pieces. Keeping the receiving surface flat and the reference lines accurate makes the later decorative assembly easier.
Establish the Installation Interface
Before any backing panel is fixed overhead, the complete mounting method must be determined for the actual ceiling.
That includes identifying suitable supports, evaluating the proposed assembly weight, choosing suitable mechanical attachments, and confirming that the materials and installation arrangement meet the applicable requirements.
The decorative plywood, wood glue, brads, and candidate screws do not independently establish a verified overhead fastening system.
For this reason, the reference sections show the relationship between the decorative layers and tray geometry without prescribing an unverified anchor pattern.
Once a qualified installation method has been established, the backing may be coordinated with it while preserving the planned panel joints and herringbone reference lines.
Assemble the Herringbone Field Without Losing Pattern Alignment
With the pieces cut, the finish tested, and the backing arrangement established, the next task is to bring the herringbone field together.
This stage depends on accuracy more than speed. A small change in the position of one piece can affect several following rows, especially near the center of the field.
For the clearest working sequence, begin with a flat mockup or assembly area where the pieces can be arranged and checked against the approved pattern.

Keep the First Rows Square
Step 1: Establish the reference lines. Mark the required pattern orientation on the backing mockup using the approved drawing.
Step 2: Position the first pieces. Arrange the starting planks so their ends and long edges meet at the intended right angles.
Step 3: Check the alignment. Use a square and straightedge to confirm the orientation before extending the pattern.
Step 4: Add the next pieces. Preserve the alternating arrangement, using the preceding pieces and reference lines to preserve consistency.
Step 5: Inspect the developing pattern. Check the overall direction and joint alignment after each manageable group rather than waiting until the entire field is assembled.
The starting arrangement matters because the herringbone pieces connect visually. If the initial layout shifts, the error can continue across the field.
Maintain the Pattern Through the Field
Work through the labeled pieces in the sequence established during the dry-fit stage.
Diagnosing Common Alignment and Fit Issues
Even despite careful planning, minor issues can arise during installation. Here are a few common problems and suggestions for addressing them:
– If a plank does not fit because it feels too long, double-check its measurement against the cutting layout. Trim small amounts as needed, but avoid over-cutting.
– If there are gaps between pieces, inspect the cut edges for squareness or debris. A light sanding can help correct tight spots or small irregularities.
– For misaligned joints, start by checking if the first rows are truly square. Adjustments to early rows can help correct a pattern that has begun to drift.
– If a whole section seems to be off, remove the affected pieces carefully and realign them, using your original reference lines as a guide.
– When pieces vary slightly in color or thickness, group similar pieces together in less prominent areas to create a more consistent overall look.
Taking the time to resolve small issues as they appear will help ensure your finished ceiling looks precise and well-crafted.
Keep the edges clean and avoid forcing pieces together when their dimensions do not match. A piece that seems slightly too long or too wide should be checked against the cutting layout before being altered.
Where appropriate, the selected Titebond Original Wood Glue may be used for compatible nonstructural wood-to-wood bonding within an assembly. Follow its instructions for application, assembly conditions, clamping, and curing.
However, adhesive bonding and decorative brads must not be presented as substitutes for the engineered mechanical retention needed when components are installed overhead.
If a portion of the field is intended to be assembled into a larger panel before installation, the size, weight, handling method, and attachment arrangement must be evaluated as part of the approved site-specific design.
The 3D model is useful here because it shows the patterned pieces as individual components above the backing, making the relationship between the field, panel joints, and tray boundaries easier to inspect.
Finish the Cut Edges at the Perimeter
As the pattern reaches the edge of the central rectangle, use the labeled boundary pieces from the cutting layout.
Check each piece against its intended position before making a permanent joint.
The reference design includes a concealed 1/8-inch perimeter allowance, but the final edge condition must be coordinated with the actual trim and material movement requirements.
The goal is not to make every boundary cut decorative on its own. The surrounding trim will define the finished edge, so the important requirements are accurate termination, proper clearance, and continuous pattern alignment.
Before moving on to the wood-wrapped tray returns, inspect the full decorative field for misplaced pieces, inconsistent joints, damaged finishes, or visible changes in pattern direction.
Wrap the Tray Returns and Finish the Perimeter Trim
The herringbone center creates the pattern, but the wood-wrapped tray edges give the ceiling its finished architectural shape.
Without a carefully planned border, the individual planks can look like a decorative panel placed inside a recess. The wrapped returns and perimeter trim connect that panel to the two tray levels, making the entire ceiling treatment feel like one coordinated piece of woodwork.
The approved 3D model represents eight wood return components and eight perimeter trim segments. These are the components of the reference design, not a final cutting list for every ceiling.
Prepare the Wood-Wrapped Returns
The vertical returns are the surfaces connecting the different tray elevations. Covering them with coordinated wood creates a continuous finish between the horizontal ceiling areas.
The reference design uses two elevation changes: 4 inches (101.6 mm) at the first level and another 3 inches (76.2 mm) at the second.

Before cutting the return pieces, check the actual dimensions of each exposed vertical surface.
Step 1: Measure each return separately. Record its length and exposed height. Do not assume opposite sides are identical without checking.
Step 2: Identify the corner joints. Decide how the wood pieces will meet at each corner, using the approved section and plan to maintain the intended appearance.
Step 3: Mark the return pieces. Transfer the verified measurements to the selected decorative plywood, considering the actual adjoining trim and material thickness.
Step 4: Cut and dry-fit the pieces. Check the corners, vertical alignment, and transitions to the horizontal surfaces before finishing the final batch.
Step 5: Prepare exposed edges. Smooth appropriate cut edges and test any visible edge finishing on sample material.
Birch plywood has a different appearance along its exposed edges than across its face. If an edge remains visible, its treatment should be decided before staining rather than concealed with an improvised finish afterward.
The returns should appear continuous when viewed from below, even though they are fabricated from separate pieces.
Fit the Pine Perimeter Trim
The perimeter trim provides a clean border between the herringbone field, the wrapped returns, and the adjoining ceiling surfaces.

The reference design uses RELIABILT Select Pine boards with an actual cross-section of approximately 0.75 × 2.5 inches (19.05 × 63.5 mm).
For a rectangular layout, the corners require particular attention. Uneven miters or inconsistent reveal widths can be noticeable because the surrounding edges form long, straight lines.
Step 1: Establish the trim alignment. Use the reference drawing to determine where each trim segment sits in relation to the herringbone field and tray returns.
Step 2: Measure the individual runs. Record the required length of each piece after confirming the actual corner conditions.
Step 3: Mark the miters. For square corners, a conventional matched miter arrangement may be appropriate. Confirm the actual angles before cutting.
Step 4: Cut and dry-fit the trim. Arrange the pieces in their intended sequence and check that the corners close neatly without forcing the joints.
Step 5: Compare the trim with the finished wood. Place a stained sample against the herringbone and return materials to check color consistency.
Step 6: Complete the approved installation. Once the supporting and attachment arrangements have been established for the site, position the trim according to that design whilst maintaining the planned joints and exposed faces.
The trim should visually frame the herringbone without covering more of the patterned field than intended.
Finish the Joints and Wood Transitions
After the decorative pieces are fitted, inspect the joints under normal room lighting.
Small surface imperfections in appropriate unfinished wood areas may be treated with DAP Plastic Wood Professional Natural, provided the filler is compatible with the planned finish. Test it on a sample first, because filled areas can absorb stain differently from surrounding wood.
Avoid using filler to hide large, poorly fitted miters. Those joints are better corrected by checking and adjusting the pieces before final finishing.
For transitions against painted ceiling surfaces, DAP Alex Plus White can be considered where a paintable caulk joint is appropriate. It should not be used as a substitute for a properly fitted stained-wood joint.
Once the necessary corrections are complete, touch up the finish using the tested staining and coating method.
Look across the trim from several positions in the room. The lines should remain visually consistent, the corners should appear deliberate, and the wrapped surfaces should connect naturally to the patterned center.
Inspect the Finished Ceiling and Coordinate It With the Library Wall
Once the decorative assembly is complete and the site-approved installation has been carried out, inspect the ceiling as a whole rather than focusing only on individual joints.
Stand near the room entrance and look toward the opposite wall. This wider view makes it easier to notice differences in border width, pattern alignment, or wood color.
Then move closer to inspect the details.

A useful final inspection includes the following checks:
- Pattern alignment: Follow the herringbone rows visually and look for misplaced pieces or abrupt changes in direction.
- Perimeter consistency: Check that the border maintains its intended relationship with the central field.
- Corner joints: Look for visible gaps, uneven miters, or trim pieces that do not meet neatly.
- Wood finish: Inspect for noticeable differences in stain absorption, damaged areas, or inconsistent clear-coat sheen.
- Surface transitions: Check where the stained wood meets painted ceiling surfaces and where horizontal sections connect to the wrapped returns.
- Installation approval: Have the responsible qualified installer confirm that the overhead assembly and its attachment system meet the agreed site-specific requirements.
Pay attention to how the ceiling appears under the room’s existing lighting conditions. Light falling across the wood can make differences in grain, finish, and joint alignment more noticeable.
Coordinate the Ceiling With the Library Wall
The strongest design connection comes from the relationship between the ceiling and the woodwork below.
In a room with substantial built-in shelving, the ceiling can present a different pattern while preserving a similar level of architectural detail.
For example, the straight shelves, vertical dividers, and surrounding trim in a DIY IKEA Billy Bookcase Library Wall create an organized framework. The diagonal wood pattern overhead provides contrast without requiring the bookcases and ceiling to use identical materials.
You can make that relationship feel more intentional by paying attention to the wood tone, the thickness of visible borders, and the overall amount of decorative detail.
A warm medium-brown finish, like the Early American stain selected for this reference design, provides a noticeable contrast against lighter surrounding surfaces. However, the final color should be judged alongside the actual room finishes rather than chosen from a product label alone.
If the library wall is already visually detailed, keep the ceiling’s surrounding trim restrained and allow the herringbone pattern to remain the main feature.
The two elements should complement each other without competing for attention.
Making the Herringbone Ceiling Work in Your Own Room
The most useful part of this design is not the exact size of the reference ceiling. It is the method of organizing a detailed wood pattern inside a clear architectural frame.
A smaller room may benefit from narrower perimeter bands or a reconsidered plank size. A larger room may accommodate a wider center field while preserving the same herringbone orientation.
Rather than simply scaling every component by the same percentage, begin with the proportions of your actual ceiling. Establish the tray boundaries, decide how much of the surface should carry the pattern, and calculate the individual pieces from that finished field.
The design drawings and 3D model can help you grasp those relationships before committing to materials. A qualified professional should resolve the supporting structure and overhead attachment details before permanent installation.
With carefully checked dimensions, accurately prepared wood pieces, a tested finish, and well-fitted perimeter details, a herringbone double tray ceiling can become a natural architectural companion to the craftsmanship of the room below.