


The trim is what makes a row of BILLY bookcases start to look like part of the room. For this IKEA BILLY built-in trim and paint project, the main steps are straightforward: first, measure your wall and bookcases; then, plan the layout and the trim placement; next, cut and fit the trim pieces; attach the trim securely; and finally, fill, prime, and give everything a coordinated teal finish. You’ll plan a continuous crown line, cover the visible breaks between cases, and use paint to tie the shelving and trim into a continuous look.
Start with the room measurements, then use the drawing and 3D model to work out where each piece of trim belongs. Once you’ve checked the actual surfaces and fitted the boards, careful filling, priming and painting will do much of the visual work.
Why trim and one continuous finish change the whole bookcase wall
Place several bookcases side by side, and your eye will usually find the joins first: the gaps between cases, their separate top edges, and the change from shelving to wall. Vertical trim can cover the front joins. A crown line across the top gives the row one continuous edge and helps the shelving meet the room more deliberately.
Paint ties those added pieces to the cases. Keeping the shelves, trim, and any included door fronts in the same teal reduces the contrast between the existing units and the new work. You can see how this detail fits into the larger idea in my BILLY library wall guide.
Look closely at the transitions before choosing trim. The aim is to decide which edges need covering and which joints will still be visible after paint. That gives you a reason for every board you add.
Measure the room and check what could affect the layout
Measure the available wall width at several heights, then measure from floor to ceiling in more than one position. Use a level to check that the floor and ceiling are even by placing it flat along their surface and making sure the bubble centers between the lines. This helps you detect any slopes or irregularities. A small variation can change the width of a side filler or the way crown moulding meets the ceiling.

Mark the locations of baseboards, outlets, switches, vents and anything else that might interfere with the cases or trim. Check the depth available in front of the wall and the space needed to move the units into position. Record these conditions on a simple sketch alongside your measurements.

Before covering the tops or sides, check the current bookcase instructions and the wall construction so you can plan the required anchoring. For safe anchoring, beginners should look for wall studs to ensure the bookcases are securely fastened—use a stud finder to locate them behind the drywall.
Avoid anchoring only into drywall or plaster, as this is often not strong enough to hold the weight. Also, look for electrical wires, plumbing, or other concealed services where you plan to drill, using a multi-function stud finder or by consulting diagrams of your home if available. Trim does not replace the bookcases’ fixing method. If the wall or any concealed services are uncertain, resolve that with an appropriately qualified person before drilling or fastening.
Use the prototype dimensions to plan—not replace—your own layout
The project drawing and 3D model arrange four bookcases with four height extensions. Their working outer envelope is 126 inches wide, 11 inches deep and 93¼ inches high. Those figures make it easier to picture the proportions and compare the arrangement with your measured wall.

Use the drawing to mark the main case positions and the intended trim runs on your room sketch. Use the 3D model to examine how the crown, vertical boards and case fronts relate to one another. The model uses simplified outer shapes, so it cannot tell you the exact size of a hidden fixing point or how a board will meet an uneven wall.

Keep your measured room dimensions beside the drawing. Confirm the dimensions of the actual units you have or intend to buy, then adjust the fillers and trim to the space. Make a cut list only after the cases are positioned, and the real gaps have been measured.
Loading interactive drawing…
Choose trim and finish materials after checking the surfaces
For the painted front joints and top edge, look for straight, paintable trim with a profile that suits the room. The reference design uses ½-inch-thick boards about 3 inches wide for face trim and a crown profile about 3⅝ inches wide. The modeled stock lengths help plan the arrangement; the number of boards to purchase depends on your measured cuts, joins and waste.
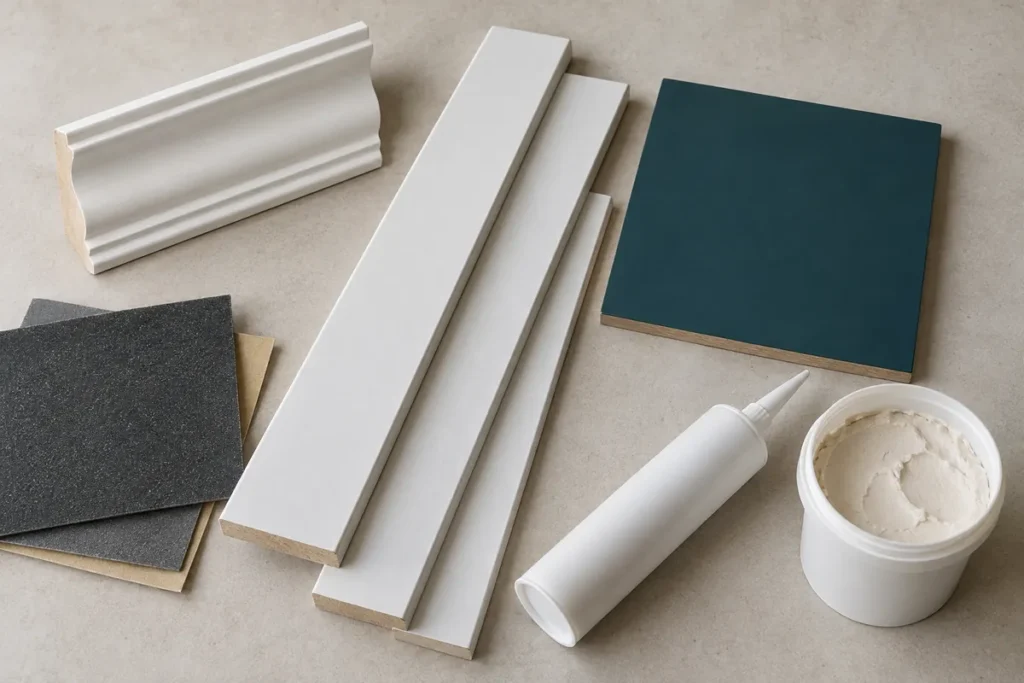
Check what each case surface is made of before choosing the finish system. A smooth furniture surface may need cleaning, light dulling and a bonding primer, while the trim may have different preparation needs. Test the proposed primer and paint together on an inconspicuous area and check their instructions for the actual surface. Do not assume that a primer described for one type of laminate has been proven on every BILLY finish.
Gather the measuring and fitting tools with the materials: tape measure, level, and pencil. For beginners, a basic hand saw or a miter box with a saw can be good choices for cutting trim accurately without specialized equipment. If you want straighter or easier angled cuts, a simple electric miter saw is also suitable and widely available to rent. For sanding, start with a sanding block or a medium-grit sponge, or use a palm sander for quicker results on larger surfaces. Have filler and paintable caulk ready as well. Select brushes or rollers according to the coating instructions. Once the finish test and room measurements are settled, you can prepare the cases and mark the trim transitions with confidence.
Prepare the cases and plan each trim transition
Position and align the bookcases according to your measured layout. Check the fronts with a straightedge and the tops with a level before marking any trim. If one case sits forward of its neighbor, a board across the joint will make that difference more obvious. Resolve the alignment first, and follow the bookcase instructions for joining and anchoring the units.

Mark where each vertical board will meet the cases, where the crown will begin and end, and how the trim will return at the sides. Check that shelves and doors can still move as intended. The drawing gives you the planned arrangement; the positioned cases give you the measurements for the actual pieces.
Remove or protect hardware and surfaces that should stay paint-free. Clean the case surfaces, let them dry, and prepare glossy areas according to the coating system you have tested. Whenever sanding or using primers, paints, or other chemicals, wear a dust mask or respirator and safety goggles to protect yourself from airborne particles and fumes. Beginners in particular should take care not to skip these important safety steps. Keep dust off the surfaces before priming.

Cut and fit trim only after confirming the real measurements
Measure each opening and trim run at its installed location. Mark the board carefully at the cut line and recheck your measurement before cutting—measuring twice saves time and mistakes later. Always make sure the board is positioned correctly, with the finished side facing as it will appear on the case. Secure the trim piece with clamps to a stable work surface to keep it from shifting, and keep your fingers well clear of the saw path. Cut slowly and steadily with a saw suited to the material and profile, following your marked line precisely.

Dry-fit each piece before fastening it to verify the fit. For crown moulding, test the corner and end joints as well as the long run across the cases, since ceiling variation may call for individual adjustments.

Work from the visible front transitions toward the less prominent returns. Hold adjacent boards in place together so you can check that their edges form a consistent line. Use the 3D model to understand how the pieces relate, but let the real wall and cases determine the final cuts.
Choose fasteners and their locations only after checking the case construction, trim material and what lies behind the fixing point. Do not drive a fastener into an unknown area. Once the fit is right and the fixing method is confirmed, attach the trim without pulling the cases out of alignment.
Make seams disappear with careful filling and caulking
Inspect the fitted trim in good light. Use a suitable filler for nail holes and surface defects, following its directions before sanding it flush. Remove the sanding dust so it does not spoil the finish.

Use paintable caulk at small joints where trim meets another surface, and slight movement may occur. Work on one manageable length at a time, smooth the bead, and remove excess before it skins over. Keep filler and caulk in their appropriate roles: a large or uneven gap usually needs a better-fitted piece or a deliberate filler board, not a thick bead of caulk.

Let each material reach the condition its instructions require before priming or painting. Run a hand and your eye along the front edges afterward. Raised filler, open corners and uneven caulk lines are easier to correct now than after the teal finish goes on.
Prime and paint for a consistent teal finish
Start with the coating system that passed your small-area compatibility test. Clean away any remaining dust and make sure the surfaces are dry. Apply primer to the prepared case surfaces as its instructions require, then treat any bare or repaired trim areas as specified for that material. Check the coat in angled light before proceeding; a missed edge is easy to overlook among the shelves.

A researched bonding-primer example calls for a clean, dry, sound surface and a test area prior to full application. A researched matte cabinet-paint example calls for glossy surfaces to be sanded dull and wiped clean, and specifies a premium synthetic brush or a quality roller with a ⅜- to ¾-inch nap. Those instructions are useful when considering that particular system, but confirm compatibility and follow the directions for the exact primer and paint you use.
Paint the detailed edges with the recommended brush, then cover the wider faces with the applicator suited to your coating. Keep a wet edge where practical and watch for buildup in inside corners, shelf joints and door details. Follow the chosen products’ recoat and curing directions before replacing hardware or putting items on painted shelves. A surface can feel dry before it is ready for everyday contact.

Review the finished transitions and style the shelves simply
Once the paint has cured as directed, inspect the wall in daylight and with the room lights on. Look across the crown for breaks in the line, along the vertical trim for uneven edges, and around the shelves for drips or missed spots. Touch up defects using the coating instructions. Refit any removed hardware, then check that doors and adjustable shelves still work freely.
Add books and objects gradually. Leave some open space so the teal finish and the continuous trim remain visible. Keep heavier items within the bookcases’ stated limits, and check that styling does not obstruct doors or required fixing points.

Make the finish fit your room
The most useful order is simple: measure the room, position and secure the cases, fit the trim to the real gaps, prepare the surfaces, then fill, prime and paint. The drawing and 3D model help you plan that sequence, while measurements taken from your installed units determine the final cuts.
If anchoring, concealed services or an unusual wall condition falls outside what you can verify, bring in a qualified professional before fastening or drilling. Take your time at the joins and finish test; those checks give the painted wall its sense of continuity.