
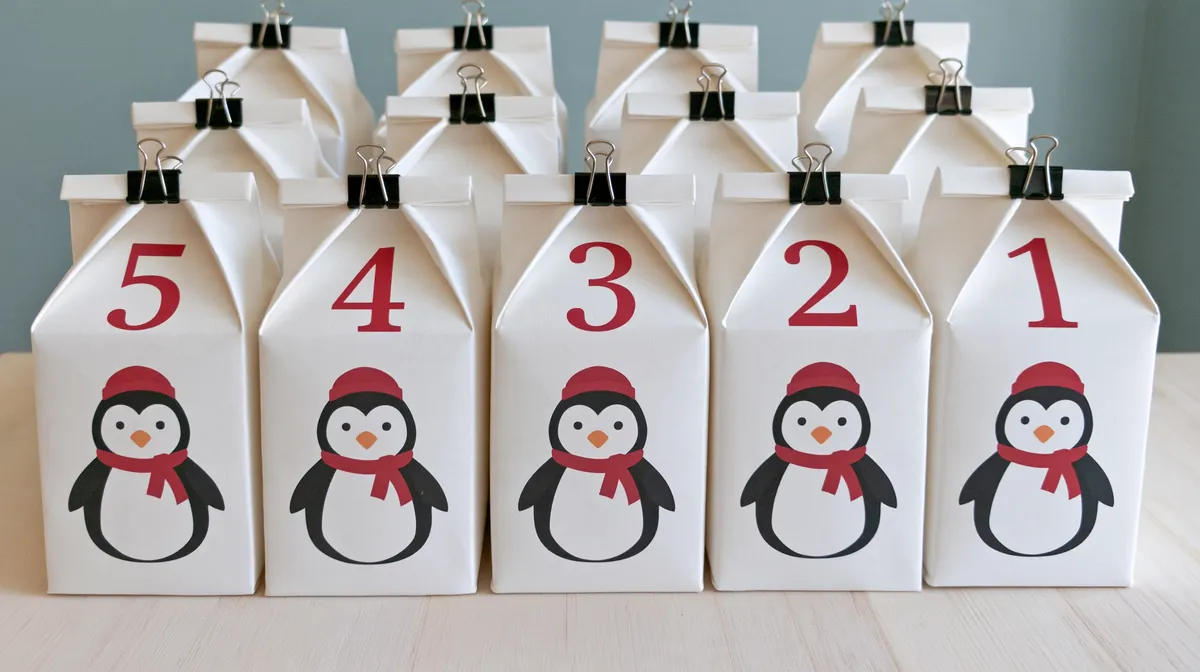
There’s something special about having a little surprise to look forward to every day. An advent calendar makes the countdown feel more exciting, especially when it doubles as a handmade decoration that brings color and personality into your home.
What I love about DIY Advent Calendar Decor is that you don’t need expensive supplies or advanced crafting skills to make something beautiful. Everyday items like empty toilet paper rolls, colorful paper, old baking pans, and a few decorative ribbons can become creative countdown displays with just a little imagination.
If you do not have these specific items, you can easily substitute materials you have on hand, such as small cardboard boxes, envelopes, paper cups, or even leftover gift bags. The key is to look around your home for simple supplies that can be transformed into a festive and personal advent calendar.
Whether you’re making one with your kids or simply want to add a special touch to your seasonal decorations, these ideas are fun, practical, and easy to adapt to your space.
Toilet Paper Roll Wreath with Colorful Crepe Paper Candies
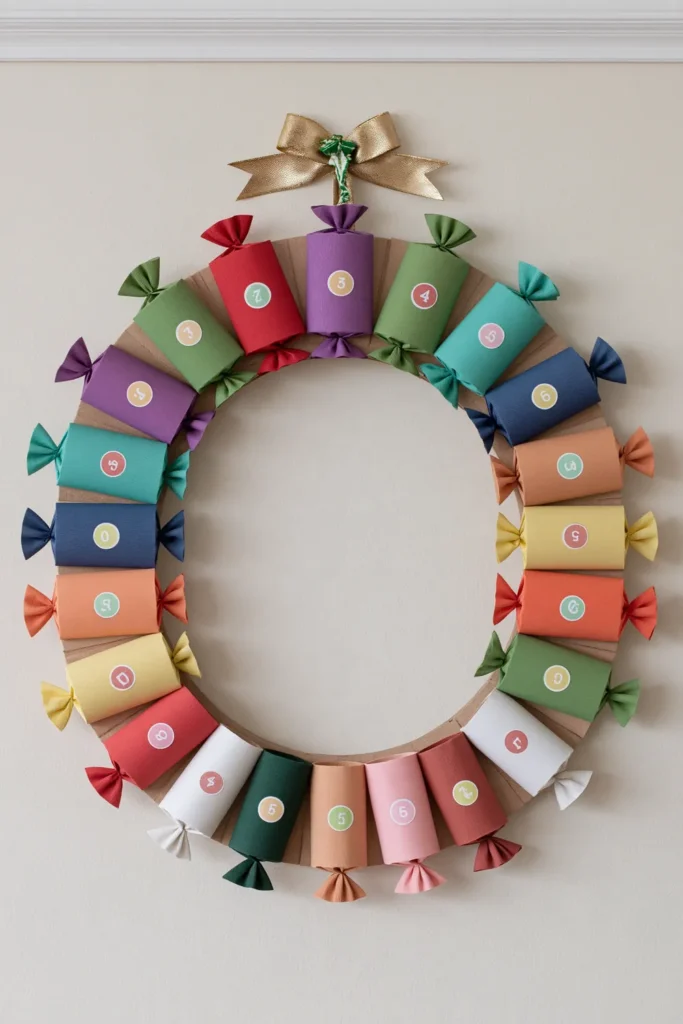
If you have a collection of empty toilet paper rolls waiting to be recycled, this colorful wreath is a wonderful way to give them a second life. Instead of traditional advent calendar boxes, each day is represented by a little candy-shaped package wrapped in bright crepe paper.
Commence by gathering 24 empty cardboard rolls and several colors of crepe paper. Cut the paper into pieces large enough to wrap around each tube, leaving some extra material at both ends. Once you’ve placed a small treat or message inside, twist the paper ends and secure them with thread to create the appearance of wrapped candies.
Using different colors makes the finished wreath especially cheerful. You could alternate red, pink, green, and yellow, or choose a smaller selection of colors that coordinates with the rest of your home.
For the wreath base, cut a large ring from sturdy cardboard. Arrange the 24 wrapped rolls around it before attaching them, making sure the colors look balanced and the packages fit comfortably together. To hang your finished wreath securely, punch two small holes at the top of the cardboard ring and thread a strong ribbon or cord through them.
Tie the ends in a secure knot to form a loop for hanging. If your wreath is heavier, you can add extra support by using strong adhesive hooks or a removable wall hook rated for the mass of your wreath, making sure it is attached to a stable surface. This will help ensure your advent calendar stays in place throughout the season.
Add small adhesive labels numbered from 1 to 24 so each candy has its own day. A decorative ribbon at the top completes the wreath and provides a lovely finishing touch.
I particularly like this idea for a children’s craft area because it feels playful without requiring complicated materials. Kids can help choose paper colors, attach the numbered stickers, and decide what little surprises should go inside.
Hang the wreath somewhere everyone can easily see it, making sure the mounting is secure enough to support the finished decoration. While the days pass and the little packages are opened, the wreath becomes part of the countdown tradition.
Hanging Toilet Paper Roll Gift Packages with Decorative Ribbons
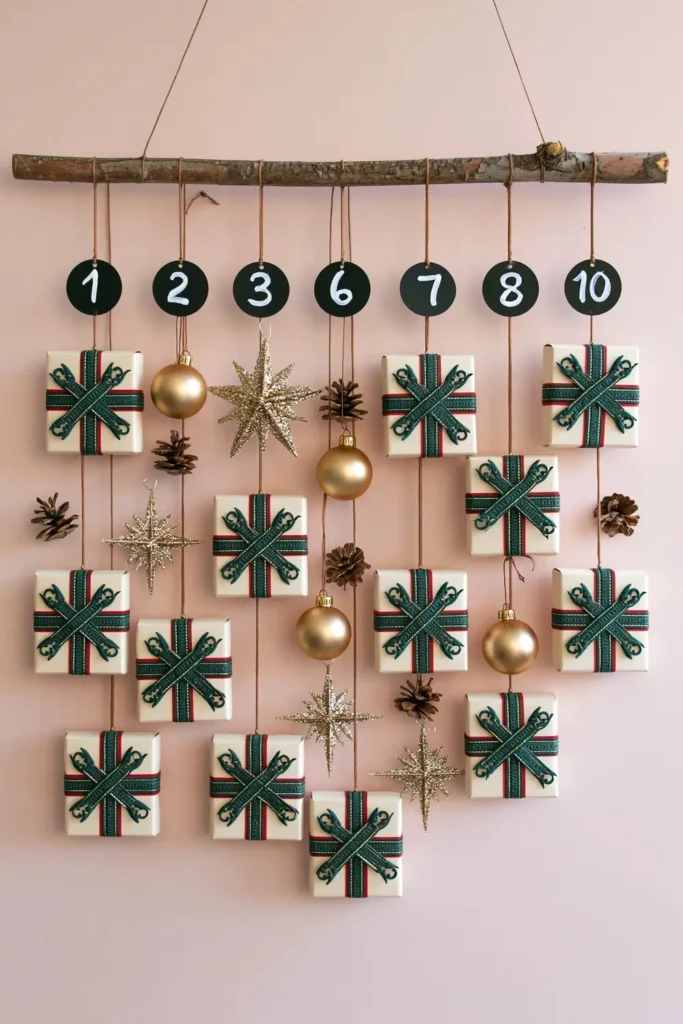
Another creative way to reuse empty toilet paper rolls is to turn them into miniature gift packages that hang together as a decorative advent calendar.
This design has a completely different appearance from the candy wreath. Instead of arranging the rolls in a circle, you’ll create individual wrapped packages and suspend them at different heights using natural twine.
To make the packages, gently fold both ends of each toilet paper roll inward until they form a small closed container. Add a lightweight surprise before sealing the package, then wrap the outside with decorative paper.
You can experiment with different wrapping paper motifs while keeping the overall look coordinated. Colorful prints create a cheerful display, while simple papers paired with contrasting ribbons give the packages a more understated appearance.
Tie decorative ribbon around each package and add a small numbered label. Repeat until you have 24 individual gifts ready for your countdown.
The hanging arrangement is what makes this project particularly attractive. Attach natural rope or twine to the packages, varying the lengths so some hang higher while others sit a little lower.
Suspend them from a securely mounted support, leaving enough space between the packages so they can be opened individually. You could use a curtain rod, a wall-mounted dowel, sturdy adhesive hooks, or even decorative wall hooks to create an anchor point for your twine or rope.
Make sure that whatever mounting method you choose is strong enough to hold the total weight of all the packages and is attached securely to the wall or ceiling. The varying lengths create movement and make the display feel more relaxed than a perfectly straight arrangement.
This is one of my favorite approaches for homes where tabletop space is limited. The hanging packages become a decorative feature on their own, without needing a large shelf or additional furniture.
You can also make the project feel more personal by choosing wrapping paper that complements your present decor. Even though the materials are simple, repeating coordinated colors and ribbons helps the finished advent calendar look carefully arranged.
Colorful Paper String-Light DIY Advent Calendar Decor
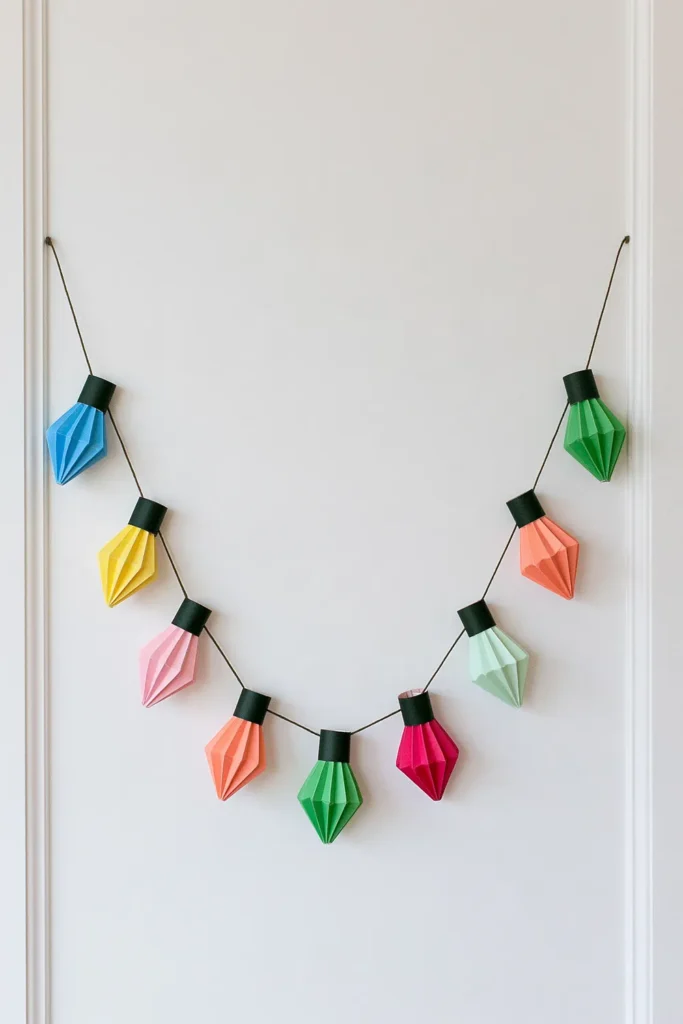
If you love bright, cheerful wall decorations, a paper string-light advent calendar is such a fun project to try. It captures the familiar appearance of decorative light strands without requiring any electrical lights.
The entire design is made from colorful paper cutouts shaped like light bulbs, making it lightweight, affordable, and easy to customize.
Begin by creating a simple bulb-shaped template from cardstock. Use it to cut 24 matching shapes from sheets of colorful paper. Including several different colors gives the finished calendar the fun appearance of a classic string-light display.
You can add a small contrasting paper piece to the top of each bulb to resemble its socket. This little detail helps make the shapes instantly recognizable, even from across the room.
Number the bulbs from 1 to 24, keeping the numbers visible and easy to read. On the back of each one, write a short message, a seasonal activity, or a small surprise for that day.
Once all the paper bulbs are ready, arrange them along a gently curved line across your chosen wall. A paper strip or lightweight cord can serve as the connecting strand, creating the appearance of hanging string lights.
Try spacing the bulbs evenly while allowing the line to dip naturally between its attachment points. This gives the finished display a softer, more decorative shape.
I especially like this idea for a child’s bedroom or playroom because it adds plenty of color without taking up valuable floor space. It’s also easy to adjust the overall size depending on the wall you have available.
For a smaller room, use compact paper bulbs and create a short, gently curved strand. If you have a larger blank wall, slightly bigger cutouts can make the advent calendar stand out more.
The best part is that the display can become an interactive decoration. Each day, one numbered bulb can be turned over to reveal its message, giving everyone a small moment to enjoy during the countdown.
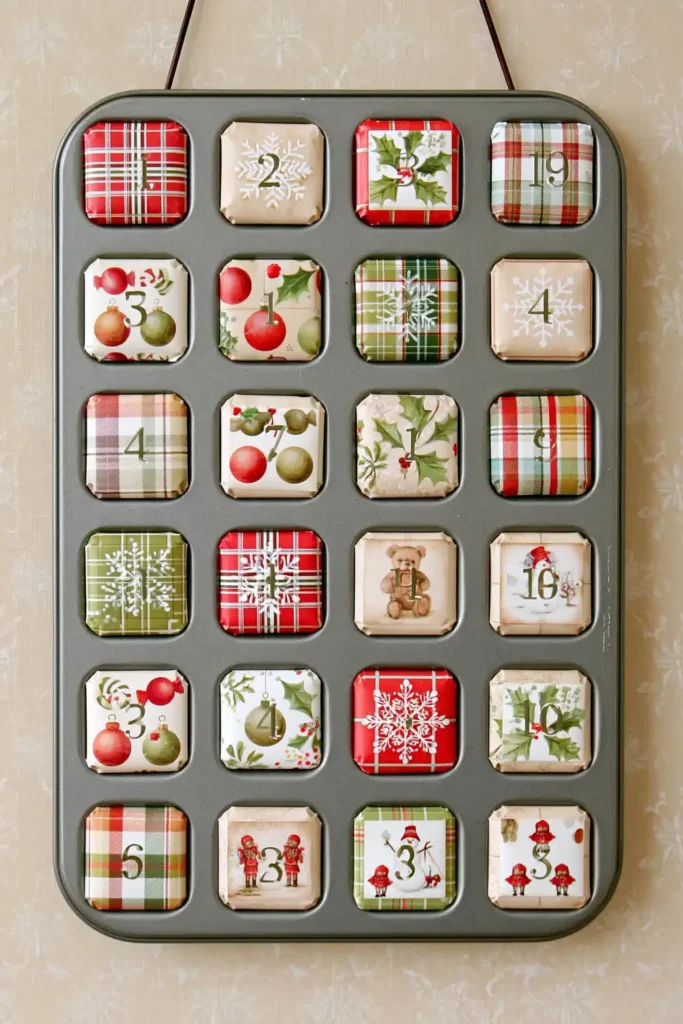
Muffin Tin Advent Calendar with Decorative Paper Lids
Sometimes the most interesting decorating ideas begin with something already sitting in a kitchen cabinet. A muffin tin might seem like an unusual choice for an advent calendar, but its individual compartments make it surprisingly practical.
Each muffin cup provides a small space for hiding a treat or message. With decorative paper covers, the entire baking pan transforms into a neat countdown display.
For this project, you’ll need 24 compartments in total. You can use one 24-cup muffin pan or arrange two standard 12-cup pans together.
Start by cleaning and drying the pans thoroughly. Then cut individual covers from sturdy paper or thin cardboard, making sure each piece is large enough to cover its muffin cup.
This is where you can have some fun with the design. Apply vibrant craft paper, decorative patterns, or matching shades to create a finished look that fits your home.
Add a number from 1 to 24 to the center of each paper lid. Keeping the lettering consistent makes the display feel organized, even if you’ve chosen different patterns for every compartment.
Before attaching the covers, place a small surprise inside each cup. Wrapped treats, folded notes, or simple activity suggestions work particularly well because they don’t require much space.
Secure the paper lids using an easily removable attachment method. Some good options include double-sided tape, washi tape, or reusable adhesive dots. Choose the option that best suits your surfaces and makes it easy to lift the cover when it’s time to open that day’s compartment.
The finished muffin tin calendar can sit on a kitchen counter or a solid shelf where it becomes part of your seasonal display. You can also mount it vertically if you have a safe, reliable way to support the pan’s weight.
What makes this idea so appealing is how little construction it requires. The compartments are already built into the pan, so most of your effort goes into decorating the lids and choosing the surprises.
It’s a practical option for anyone who enjoys handmade decorations but doesn’t want a complicated crafting project. And when the countdown is finished, a removable design lets you clean the muffin tin and return it to everyday kitchen use.
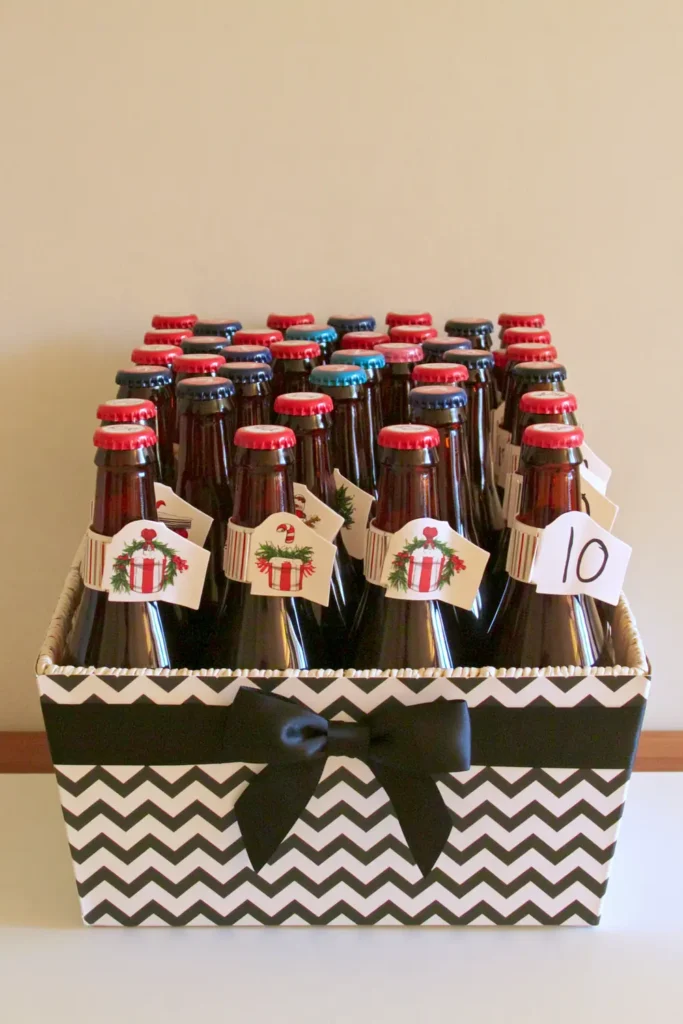
Bottle Advent Calendar for Adults
Advent calendars aren’t just for kids, and this bottle version is a fun way to create a festive countdown specifically for adults. Instead of filling little compartments with sweets or messages, you’ll put together a collection of assorted bottles, with a different one assigned to each day.
What makes this idea interesting is the variety. Different bottle shapes, label colors, and packaging designs give the display a distinctive appearance without requiring elaborate decorations.
Start by choosing 24 bottles to include in your calendar. You can select a combination of familiar favorites and different varieties to make the collection more interesting. If you’re creating it as a gift, think about the recipient’s preferences when choosing what to include.
Once you’ve gathered the bottles, assign a number from 1 to 24 to each one. Small adhesive labels and numbered paper tags work well, especially if you want the existing bottle labels to remain visible.
For a more coordinated appearance, you can wrap the bottles in decorative packaging while leaving the numbers clearly displayed. Employing similar wrapping materials helps bring together bottles that might otherwise look quite different.
Arrange the finished collection on a sturdy, level surface or in secure packaging designed to hold glass bottles upright. Because glass bottles can be heavy, it’s important to choose a display that supports their weight and prevents them from tipping over.
I like the idea of keeping the arrangement relatively simple. The different bottles already add plenty of visual interest, so you don’t need to cover the entire display with extra decorations.
If you prefer a cleaner look, use matching numbered tags and let the bottle labels provide most of the color. For something more playful, combine different wrapping papers and arrange the numbers in a way that invites a little searching each day.
This project works especially well as a personalized gift for an adult who enjoys exploring different varieties. It turns an ordinary collection into something more thoughtful, while the handmade numbering and packaging add a special touch.
Simply remember to keep the calendar safely stored away from children, and there’s no need to consume a bottle every day to enjoy the countdown. Opening each day’s package can simply be part of the experience.
Make Your Countdown Feel More Personal
The best thing about making your own advent calendar is that it doesn’t have to follow a particular style or demand a long list of expensive supplies.
A colorful candy wreath can bring a fun element to a family room, while hanging gift packages make use of vertical space. Paper string lights are perfect for adding cheerful wall decor, and a muffin tin gives a practical way to organize little daily surprises.
Even a simple collection of numbered bottles can become a thoughtful adult countdown gift when you put some care into the presentation.
When choosing your favorite DIY Advent Calendar Decor idea, think about where you want to display it, what materials you already have, and who will be opening the surprises. You can personalize each calendar to match your recipient or decor style: swap sweets for small toys, stickers, or activity cards for children; use handwritten notes, favorite teas, or pampering treats for adults.
For a modern look, choose neutral papers and metallic ribbons, or add rustic touches with burlap and twine. If you want to make the countdown more meaningful, let everyone in the family contribute ideas for what goes inside each day’s package. Adapting the colors and surprises lets you create a calendar perfect for anyone, whether you’re making it for young kids, teens, friends, or coworkers.
You don’t need perfect wrapping or matching decorations to make something meaningful. Sometimes the little handmade details are what make a seasonal tradition feel special.
Choose a project that fits your home, enjoy the process of putting it together, and let the finished calendar become part of the excitement of counting down each day.