


A DIY IKEA Billy bookcase library wall can look very different depending on how you treat the details around it. The bookcases give you the storage and the repeated structure, but the built-in feeling comes from the decisions around them: the lower doors, trim, thicker shelf fronts, crown moulding, paint color, ladder, and the way the wall connects visually to the ceiling.
This project takes you through the full process of transforming a set of IKEA Billy bookcases into a unified floor-to-ceiling library wall, including planning the design, confirming proportions, assembling and modifying the bookcases, adding custom trim and cabinet-style doors, incorporating a ladder and ceiling detail, preparing and painting all components for a consistent finish, and finishing with styling and final checks. Every step is focused on turning standard components into an integrated, built-in feature that fits your room.
Before you start cutting trim or buying every part, the important work is measuring, checking proportions, and deciding which details your room can actually support. In this guide, I’ll walk through the layout logic, the main components, the drawing and 3D model references, the finish system, and the site checks that should happen before anything becomes permanent.
Start With One Wall-Wide Design, Not Separate Bookcases
The strongest part of this project is not merely that it uses BILLY bookcases. It is that the full wall is treated as one piece of room architecture.
The bookcases create the practical foundation: vertical bays, shelves, and storage. The lower doors make the bottom portion feel more like cabinetry. The added trim and thicker shelf fronts help hide the modular edges. The crown and filler zone visually connect the shelving to the ceiling. Once all of those parts are painted in one consistent teal finish, the wall reads less like several separate store-bought units and more like a planned built-in.
That is the idea behind this version of the IKEA Billy bookcase library wall inspiration. Instead of copying only one feature, the goal is to understand how the pieces work together.
The rolling ladder adds one more layer. It gives the wall character, but it also affects how much space you need in front of the shelves and where the rail can safely go. The herringbone double tray ceiling idea works the same way. It is a strong design detail, but it should support the library wall rather than compete with it.
So the first decision is not “Which trim should I buy?” It is simpler: decide that the bookcases, base doors, trim, ladder, color, and ceiling treatment all need to belong to the same design.
Plan the Main Proportions Before Choosing the Finish Details
The reference layout uses five 31.5-inch-wide BILLY bays, giving the main bookcase run a planning width of 157.5 inches, or about 4000.5 mm. That width is the starting point for the rhythm of the wall. Each bay repeats the same basic spacing, so even small changes in alignment can show once the trim and paint go on.
The bookcase depth is 11 inches, or about 279 mm. That is useful because it gives the shelves a relatively shallow profile, but it also means you need to think carefully about what happens in front of the wall. A ladder, step stool, or decorative ladder will project farther into the room than the shelving itself.
The height is just as important. The BILLY bookcase plus height extension zone is planned at 93.25 inches, or about 2369 mm. In the model, a 5-inch crown and filler zone brings the overall reference height to 98.25 inches, or about 2496 mm. That upper zone is not a universal cut size. It is a planning allowance that must be adjusted to the actual ceiling height, ceiling level, and final trim profile in your room.
Width and bay rhythm
Before you buy or cut anything, measure the full wall width in more than one place. Check near the floor, around the middle, and close to the ceiling. Walls are not always perfectly parallel, and a tight bookcase run can become frustrating if you only trust one measurement.
Loading interactive drawing…
The five-bay arrangement works because it creates a strong repeated rhythm. If your wall is smaller, you may reduce the number of bays. If your wall is wider, you may add side fillers, adjust trim, or expand the run. What matters is that the final spacing looks intentional rather than leftover.
Height, crown, and ceiling gap
The top of the wall is where many built-in projects either improve or start to look awkward. If the shelves stop too low, the wall can feel unfinished. If the crown is forced within a space that is too tight, it can look heavy or make installation difficult.
Use the planned height as a reference, then check your actual ceiling. If your ceiling is lower, you may omit the height extensions and use standard BILLY bookcases. If your ceiling is higher, you may need taller trim, stacked extension units, or a larger filler zone. Do not assume the crown detail from one room will fit another room without adjustment.
Depth and circulation in front of the wall
The bookcases themselves are shallow, but the working space in front of them matters. The 3D model shows the ladder proxy projecting forward beyond the 11-inch bookcase depth. That does not mean every room needs the same ladder setup, but it does mean you should check walking space and access before committing to a rail or ladder.
If the room is narrow, a fixed rolling ladder may not be the right choice. A decorative ladder, a compact step stool, or no ladder at all may retain the same visual direction without making the room harder to use.
Choose Components That Support the Built-In Look
The main structure employs IKEA BILLY bookcases and BILLY height extensions. For this project, the compatible models are the standard 31.5-inch-wide BILLY bookcases (article number 002.638.50 or similar), along with the matching BILLY height extension units. For the lower cabinet effect, use OXBERG doors designed to fit the 31.5-inch BILLY bookcases (article number 202.758.14 or compatible). These provide the repeated vertical bays and upper storage height. Make sure to check the most recent IKEA catalog or website for the exact article numbers, as availability and finishes can change. Because the project depends on their published sizes, the first practical step is confirming the exact product versions available to you before purchase.
The lower cabinet effect comes from OXBERG lower doors. Adding doors across the bottom changes the whole feel of the wall. Open shelves from floor to ceiling can look busy, especially when they hold everyday items. A closed lower zone gives you a calmer base and lets the upper shelves carry the library look.
The knobs are a small detail, but they matter because they break up the teal finish. The selected hardware direction is Amerock Davenport BP36601CZ, a champagne-bronze style knob. In the finished wall, that warm metal tone can connect visually with the ladder hardware and keep the paint color from feeling too flat.
The paint direction is Sherwin-Williams Cascades SW 7623. The key is not only choosing a strong teal. The key is using the same finish direction across the bookcases, trim, shelf fronts, crown, and surrounding woodwork so the wall reads as one built-in feature.
Bookcases and height extensions
Use the bookcases and height extensions as the fixed reference for the layout. They control the bay width, shelf rhythm, and main height zones. Once those are set, the trim should be designed around them, not guessed separately.
If your ceiling does not support the height extensions, do not force them. Standard-height bookcases with a well-planned top trim can still look finished. The goal is proportion, not simply making the wall as tall as possible.
Doors, knobs, and trim
The doors should line up cleanly across the lower area. Their purpose is both practical and visual: they hide storage and create a more cabinet-like base. The knobs should be installed consistently so the lower run feels ordered.
Trim then becomes the layer that ties the modular boxes together. Vertical face trim can cover the meeting points between bookcases. A continuous shelf-front build-up can make the horizontal lines feel thicker and more custom. Crown and filler trim can close the gap at the top.
Paint and primer system
A consistent teal finish only works if the surface preparation is handled carefully. Clean and degrease the surfaces first. Scuff or degloss slick areas carefully. For reliable adhesion on IKEA bookcases and trim, use a bonding primer designed for laminates or melamine, such as Zinsser B-I-N Shellac Primer, INSL-X Stix Waterborne Bonding Primer, or Zinsser Bullseye 1-2-3. Then apply a compatible topcoat; for best durability, use a high-quality enamel like Benjamin Moore Advance, Sherwin-Williams Emerald Urethane Trim Enamel, or Behr Alkyd Interior Semi-Gloss Enamel. Select a satin or semi-gloss sheen for easier cleaning and harder wear. Always confirm compatibility by testing your chosen products together before painting the full wall.
Do a test patch before painting the whole wall. This is especially important on store-bought bookcase finishes, where adhesion depends on prep, primer, paint system, and cure time. The article should not promise factory-level durability. A good finish is possible, but it needs the proper preparation.
Use the Drawing Set to Check the Layout Before Building
The 2D drawing set is useful because it turns the wall idea into something you can actually check. Instead of relying only on a finished image, you can look at the front elevation, the plan depth, the height zones, and the repeated bay spacing.
Use the front view to understand the five-bay rhythm, the lower door zone, the upper shelving area, and the crown or filler space. This helps you see whether the proportions still make sense before you start committing to trim details.
Use the plan view to check depth. The bookcase depth is 11 inches, but anything added in front of the wall needs its own clearance. This is where the ladder decision becomes practical. If a ladder or rail is part of your version, it should be checked against the walking path and the way the room is used.
The editable 2D source is most helpful for technical reference, while the PDF review is easier for most readers to follow. The important point is the same: the drawing helps you measure and plan, but it does not replace site verification.
Before cutting trim or fastening the run, compare the drawing dimensions with your actual room. Check the full wall width, ceiling height, floor level, wall flatness, baseboards, outlets, vents, and any obstruction that could affect the bookcases. If something does not match, adjust the project before the work becomes permanent.
Use the 3D Model to Understand Depth, Ladder Projection, and Trim Massing
The 3D model is useful for a different reason than the 2D drawing. The drawing helps you read the layout flat. The model helps you understand how the wall starts to occupy the room.
In the reference model, the bookcase run, lower doors, crown and filler zone, face trim, rail, and ladder proxy are all represented together. That lets you check the parts as a group instead of imagining each detail separately. This is especially helpful with a project like this, because the finished look depends on massing: how thick the front trim feels, how the lower doors sit below the open shelves, and how the top filler changes the height of the wall.
The model also makes one important point clear: the bookcase depth and the full project depth are not the same thing. The BILLY bookcase depth is 11 inches. The full modeled depth is larger because the ladder proxy extends forward into the room. If your room is narrow, that difference matters.
Use the 3D model to check proportion, not to skip field measuring. It can show you how the ladder, rail, trim, crown, and door zones relate to each other, but it does not prove that your wall can carry a ladder rail, that your floor is level, or that your ceiling trim will fit without adjustment.
The STEP file is also useful for readers or makers who want to inspect the project in CAD software. It contains importable B-rep solid geometry, but it does not preserve native parametric history like a program-specific model. In plain terms, it is good for review, measuring, and coordination, but it should still be compared with the actual room before cutting or fastening anything.
Prepare the Room and the Bookcase Parts

Before the bookcases go into place, prepare the room as carefully as you would prepare the parts. A built-in wall only looks clean when the starting conditions are understood.
Clear the wall and measure it from several positions. Measure the width near the floor, at mid-height, and near the ceiling. Then check the ceiling height at more than one point. If the floor slopes or the ceiling is not level, the difference can affect the crown, filler, and side trim.
Also check anything that could interrupt the run. Baseboards, outlets, vents, light switches, cable plates, return grilles, and uneven wall surfaces can all change the installation sequence. Some items may need trim adjustments. Others may require a qualified trade before the bookcases are fixed in place.
For common obstacles, here are a few tips to help you plan:
– For baseboards, you can notch the back of the bookcase or trim, or remove a section of baseboard where the shelves will go for a cleaner built-in look. Alternatively, use thicker face trim or a shaped filler strip to fill any remaining gaps.
– For outlets or cable plates, mark their locations before placing the cases, then cut precise openings in the cabinet back or side panel to allow continued access. If you prefer not to make cutouts, position shelving to keep outlets accessible between bays or just above the base zone.
– For vents, avoid blocking airflow by either rerouting ductwork, using a vent deflector, or adjusting the bookcase placement to leave clearance. For floor return grilles, keep a gap at the bottom or incorporate a grille cover into the trim design.
These kinds of adjustments are much easier to plan before you fasten anything, so walk through the whole wall and note any obstacles in advance.
Lay out the bookcase run before committing to fastening. Mark the left and right limits of the wall on painter’s tape. Then mark the bay divisions so you can see whether the five-bay rhythm makes sense in the actual room. This straightforward step can reveal problems that are harder to solve once the units are assembled.
Prepare the bookcase parts in the same practical order. Confirm that the BILLY units, height extensions, lower doors, knobs, trim stock, primer, and paint system are all compatible with the version you are building. If you are adapting the project to fewer bays or a lower ceiling, make those decisions before you begin assembly.
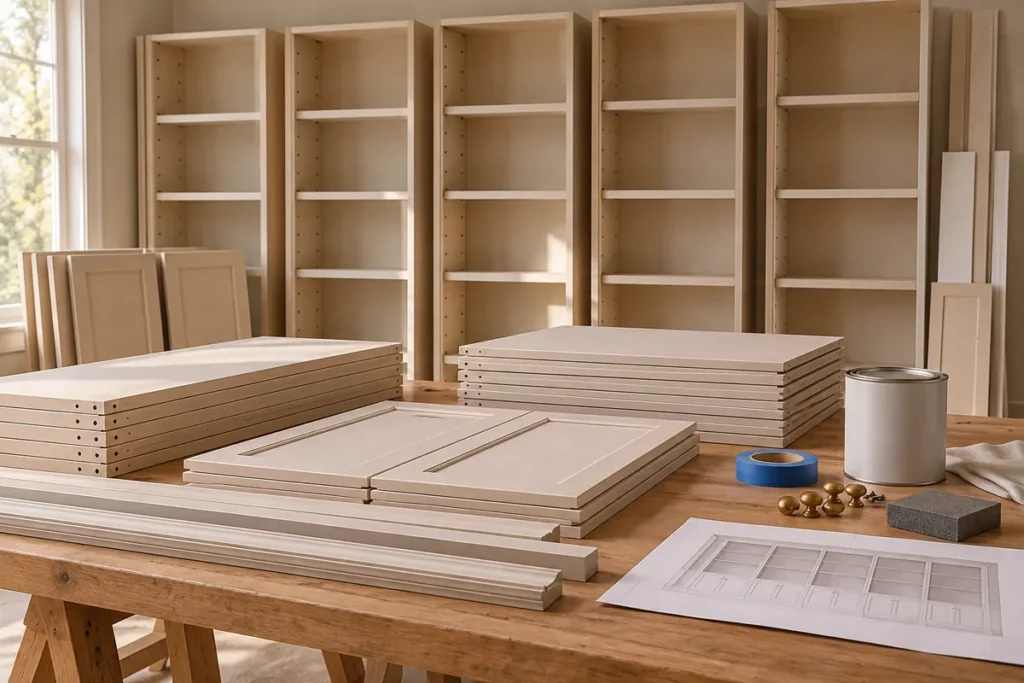
This is also the point where you should decide how the wall will be secured. The drawings and model can help you understand the layout, but anchoring depends on the wall structure, the manufacturer’s guidance, and the conditions in your room.
Build the Bookcase Run and Create the Cabinet-Like Base

Start by assembling the bookcases according to the manufacturer’s instructions, then bring them into position as a continuous run. Do not rush the alignment. The cleaner the boxes are at this stage, the easier the trim work will be later.
Set the units side by side and check the front faces. The goal is to create one straight visual plane across the wall. If one unit sits slightly proud or slightly back, the face trim and shelf-front build-up will be harder to make consistent.
Once the main bookcase run is positioned, check the vertical lines between bays. These repeated divisions are part of what makes the wall feel organized. They should look deliberate before any paint or decorative styling is added.
Aligning the five-bay run
For the reference layout, the five 31.5-inch bays create the full 157.5-inch planning width. In your room, the number of bays may change, but the alignment principle stays the same.
Check the run from the front, then check it again from an angle. Look for uneven gaps, leaning sides, or shelves that do not read level. Small differences can become more noticeable after trim is added, because trim creates long straight lines that reveal misalignment.
If the wall or floor is not perfectly flat, use the appropriate leveling and shimming approach for your site and follow safe fastening guidance. Do not depend on trim to hide a structural or stability issue.
Creating a closed lower storage zone
The lower OXBERG doors help the wall feel more like built-in cabinetry. They also give you a practical place to hide items that would make open shelves look cluttered.
Install the lower doors only after the cases are aligned well enough for the gaps to look consistent. The door fronts should support the horizontal baseline of the wall. If they look uneven, fix the positioning prior to moving on to knobs or finish work.
The brass knobs are a small part, but they give the lower zone a finished rhythm. Install them consistently and check the spacing by eye across the full run, not just on one door at a time.
Add Trim, Shelf Fronts, Crown, and Filler as One Visual Layer
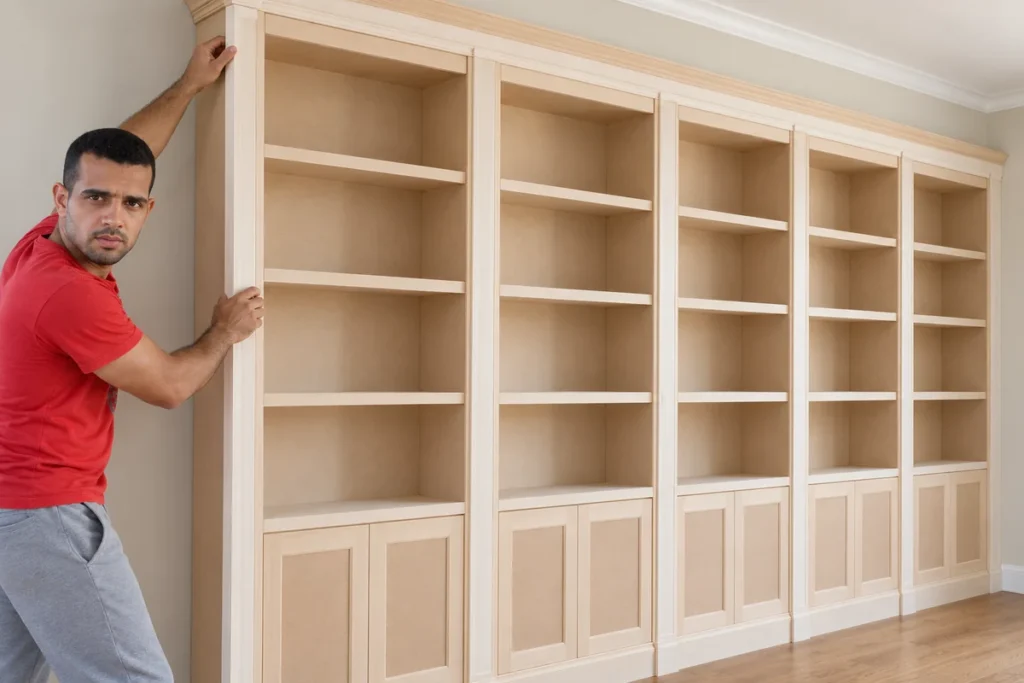
The trim is what changes the project from a row of bookcases into a library wall. It should be planned as one visual layer across the whole run.
Vertical face trim can cover the meeting lines between individual bookcases and make the bays feel intentional. A continuous shelf-front build-up can make the horizontal lines feel thicker and more substantial. Crown and filler at the top can close the visual gap between the shelving and the ceiling.
The important thing is to avoid treating each trim piece as a separate decoration. The trim should support the bookcase pattern that is already there. If the vertical strips fight the bay spacing, or the crown feels unrelated to the shelf structure, the wall can start to look patched together.
Before cutting trim, mark the main trim positions on the installed units. Check the verticals first, then the horizontal shelf-front build-up, then the top filler or crown area. Stand back and look at the full wall before making final cuts.
For the reference model, the crown and filler zone is represented as a 5-inch planning allowance. That is not a guaranteed finished cut size for every room. Your actual filler height should come from the measured gap between the top of your bookcase arrangement and your ceiling, while considering the crown profile and installation method you choose.
If you are adding thicker shelf fronts, keep the depth and projection consistent across the run. This detail works best when it looks deliberate and repeated. Uneven build-ups can make the shelves look heavier in one area and thinner in another.
Finish the Whole Wall in One Teal Paint System

The paint is what finally ties the separate parts together. Without a consistent finish, the bookcases, trim, doors, and crown can still read as separate layers. With one well-prepared teal paint system, the wall starts to feel like one intentional built-in.
For this project, the selected color direction is Sherwin-Williams Cascades SW 7623. It is a strong teal, so the preparation matters. A dark, saturated finish tends to show rough prep, uneven sheen, and messy caulk lines more clearly than a pale neutral.
Start by cleaning the surfaces well. Manufactured bookcase finishes can hold dust, oils, and handling residue, so do not prime over a surface that has not been degreased. After cleaning, scuff or degloss the slick areas carefully. You are not trying to damage the surface; you are giving the primer a better chance to grip.
Use a bonding primer that is suitable for slick or factory-finished surfaces, then use a compatible topcoat. Keep the primer and paint system consistent across the shelves, side panels, doors, trim, crown, and filler pieces. If the wall, surrounding trim, or nearby woodwork will also be painted, plan that sequence before you begin so the finish does not stop in an awkward place.
Do a test patch first. Let it cure according to the product instructions, then check adhesion before committing to the full wall. This small step is worth it. The finished look depends on paint, but the durability depends on surface prep, primer choice, topcoat compatibility, and cure time.
Caulk and fill only where it makes sense. Fill small nail holes and paint-grade trim joints, then sand them smooth before finish coats. Avoid using caulk to hide movement, bad alignment, or a gap that should have been corrected with a better trim cut.
Coordinate the Ladder and Ceiling Detail Without Overstating the Build

The rolling ladder gives this library wall a lot of its character. It also adds real planning questions. A ladder is not simply a decorative line in front of the shelves; it changes access, clearance, anchoring, and how people move around the room.
In the reference model, the ladder and rail are treated as a prototype proxy. That means they help show the intended look and the forward projection, but they do not prove the final rail hardware, mounting method, or structural support. Before you install a working rail, check the hardware instructions, the wall or bookcase structure behind it, and the load requirements with someone qualified to review the installation.
Ladder access and rail planning
Start with the practical question: do you need the ladder to function, or do you mainly want the visual character? If the upper shelves are high and used often, a working ladder may make sense. If the room is narrow or the wall structure is uncertain, a decorative ladder or step stool may be a better fit.
Check the path in front of the wall. The bookcases are shallow, but the ladder projects farther forward. That extra depth can affect nearby furniture, doors, walkways, and the way the room feels when someone is using the shelves.
The rail location should relate to the shelf height and the lower door zone. It should look visually connected to the library wall, but it also has to be installed in a way that is safe for the actual structure. Do not use the 3D model as proof that the rail can be anchored in your room.
Ceiling pattern as a visual continuation
The herringbone double tray ceiling idea works because it carries the built-in feeling overhead. The wrapped wood pattern adds texture while the shelving stays strong and linear below it.
This is a design coordination step, not a requirement for every version of the project. If your room has a lower ceiling, a simpler crown and painted upper filler may be enough. If your ceiling is higher or already has tray details, the ceiling treatment can help the wall feel more connected to the architecture of the room.
Any ceiling construction should be checked against the actual ceiling condition. Do not assume framing, wiring, lighting locations, or surface attachment methods from the visual concept alone.
Style the Shelves So the Wall Still Feels Built-In

Once the wall is painted and the main details are in place, styling should support the structure instead of hiding it. The shelves do not need to be packed from side to side. In fact, leaving some breathing room helps the teal finish, vertical bay rhythm, and thicker shelf fronts stay visible.
Start by placing heavier or less attractive storage behind the lower doors. That is one of the main benefits of the cabinet-like base. It lets the open shelves hold the items that are worth seeing: books, vessels, framed pieces, and collected objects.
Work across the full wall instead of styling one bay at a time. If every bay has the same formula, the result can look stiff. If every bay is completely different, the wall can look busy. A better approach is to repeat a few visual ideas: similar book heights, warm metal accents, darker objects against the teal paint, and a mix of vertical and horizontal stacks.
The brass knobs can guide the rest of the styling. A few warm metallic touches on the shelves can connect back to the hardware and ladder without making the whole wall feel shiny. Keep those accents subtle so the main story remains the teal built-in wall.
The upper shelves can hold lighter visual pieces or books that are not reached every day. The middle shelves should be the easiest to style and adjust. The lower closed storage should do the practical work, keeping everyday clutter out of sight.
If you adapt the project without a rolling ladder, the styling becomes even more important. A well-balanced shelf arrangement can still give the wall a finished library feeling, even when the access detail changes.
What to Verify Before Recreating the Project at Home
Before you recreate this project, separate what is planned from what must be confirmed in your own room. That is the difference between a good idea and a build that actually works.
Start with the main dimensions. Confirm your available wall width, ceiling height, bookcase count, bookcase depth, and any filler space. Check whether height extensions fit comfortably or whether standard-height bookcases with a stronger top trim would be better.
Then check the site conditions. Look at the floor level, wall flatness, baseboards, outlets, vents, switches, and nearby doors. Any one of those can affect the installation order or the final trim layout.
Use a simple verification list before irreversible work:
| Check | Why it matters |
|---|---|
| Wall width in several places | Confirms the bookcase run and side filler needs |
| Ceiling height in several places | Controls height extensions, crown, and top filler |
| Floor level and wall plumb | Affects alignment, gaps, and trim fit |
| Studs or wall substrate | Determines safe fastening and rail support |
| Outlet, vent, and switch locations | Prevents blocked access or unsafe cover-ups |
| Ladder projection | Confirms walking clearance in front of the wall |
| Paint adhesion test | Reduces the risk of peeling on slick surfaces |
| Product availability | Confirms exact sizes before purchase |
The most important caution is the ladder. A working rolling ladder needs proper hardware, support, and anchoring. The drawings and model can help you understand the design, but they do not verify your wall structure.
The same applies to the ceiling detail. A herringbone or tray ceiling treatment should be planned around the actual ceiling, lighting, and structure. If anything involves electrical work, structural attachment, or uncertain load support, bring in the right professional before moving forward.
For a lower ceiling, omit the height extensions or reduce the top detail. For a narrower room, use shallower shelves, fewer bays, or skip the rolling ladder. For a smaller wall, a single-bookcase feature can still use the same idea: repeat the finish, align the trim, and make the parts feel like they belong together.
Bringing the Library Wall Together
The best version of this project comes from planning the wall as one complete feature before you start making permanent changes. The bookcases give you the structure, but the finished character comes from the measured layout, lower doors, trim, crown, teal finish, hardware, and access details working together.
Use the drawings to check the flat layout. Use the 3D model to understand depth, projection, and massing. Then use your actual room measurements to decide what needs to change before you cut, paint, fasten, or install anything.
Some parts of this project are straightforward homeowner work, especially measuring, planning, assembling bookcases, preparing paint surfaces, and styling shelves. These steps are generally beginner-friendly and can be completed with standard tools, careful preparation, and attention to detail. Other parts may need more care or the help of a professional: anchoring a working ladder rail to ensure safety, adjusting around electrical outlets or HVAC vents, and adding or modifying ceiling details like crown molding or custom tray profiles. For these more advanced steps, where structural, electrical, or safety considerations are involved, calling in a qualified contractor or specialist is recommended. Knowing which parts require professional skills will help you plan your approach, timeline, and budget more accurately.
If you adapt the idea honestly to your room, you do not need every feature to be identical. The real lesson is simpler: choose a clear wall-wide direction, repeat the finish, align the details, and let each part support the same built-in look.