
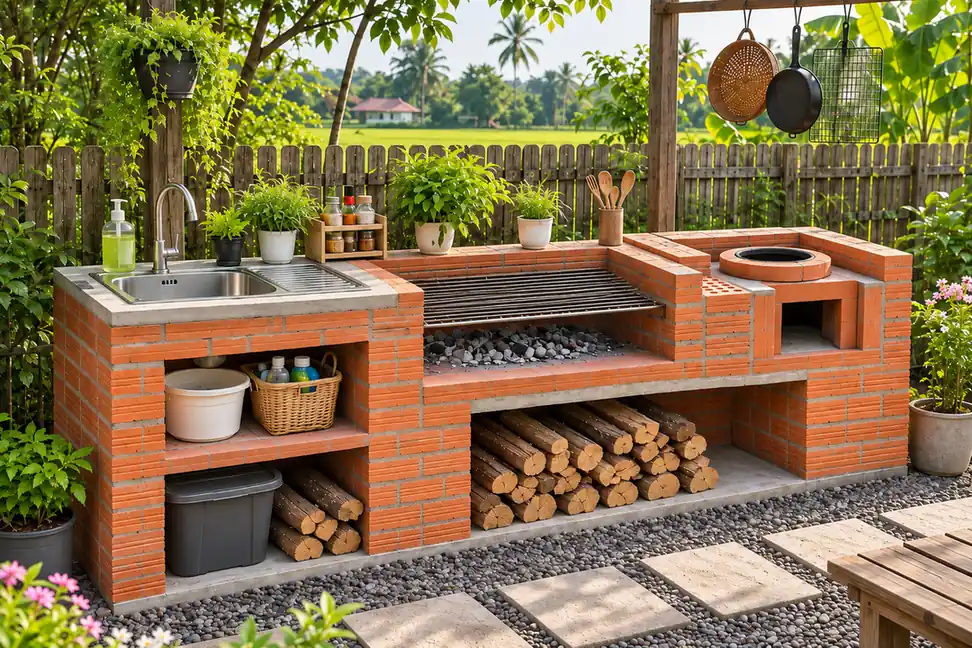
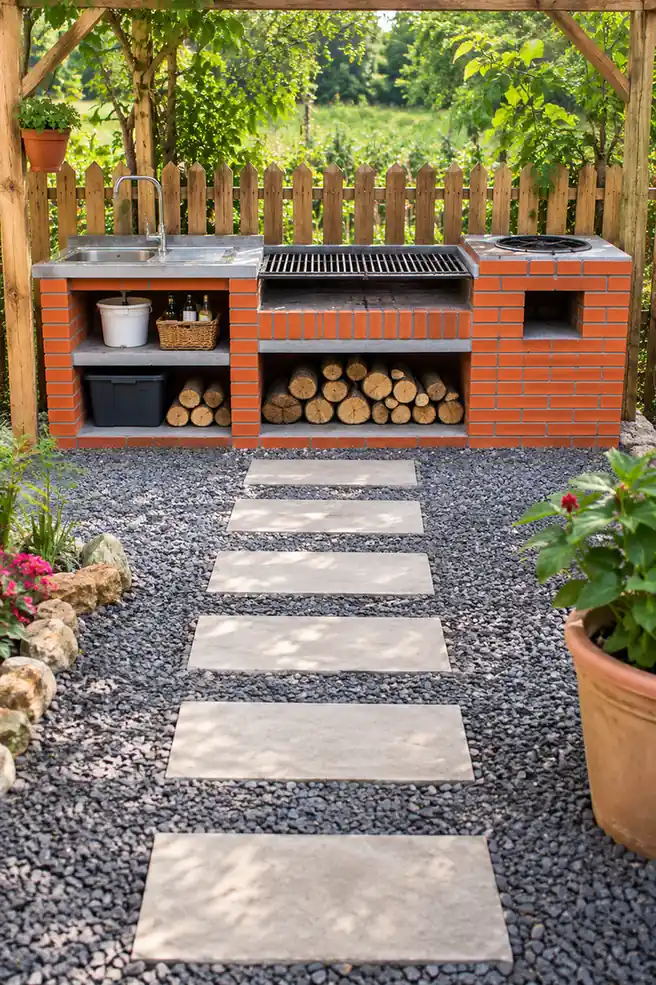
A DIY Brick Outdoor Kitchen brings washing, charcoal grilling, and wood-fired cooking together in one masonry workstation. A rectangular sink with a ribbed drainboard sits on the left, a charcoal grill occupies the center, and a raised pot stove with a circular cooking opening completes the right side. The red-orange brickwork, gray shelves, and open storage give the whole setup a practical, built-in look.
The appealing part of this layout is that each area has a job. You can rinse produce and utensils at the sink, tend food over hot coals in the middle, and heat a pot over a separate wood fire. If you’re planning a similar kitchen, the important decisions happen before the first brick is laid: where the fires can safely operate, how the openings will fit their hardware, and how the heavy masonry will be supported.
To help visualize the process, here is a brief project roadmap outlining the main construction phases:
1. Preparation and Planning: Choose a safe, open location, check fire clearance requirements, and gather installation specifications for your sink, grill, and stove.
2. Foundation Work: Pour a level, reinforced base sized for the full kitchen and expected loads.
3. Building Brickwork and Partitions: Lay out walls to define the sink, grill, and stove areas, leaving openings for storage bays and hardware.
4. Installing shelving and Concrete Worktops: Add support for open bays, formwork for work surfaces, and pour reinforced concrete slabs.
5. Fitting Hardware: Install the sink, plumbing, cooking grates, and stove components in their designated openings.
6. Final Finishes and Safety Checks: Complete pathways, storage, and exterior details; verify clearances, connections, and fire safety measures.
Following this sequence will help amateur builders organize their workflow and move through each construction phase with greater confidence.
How the Three Cooking Zones Work Together
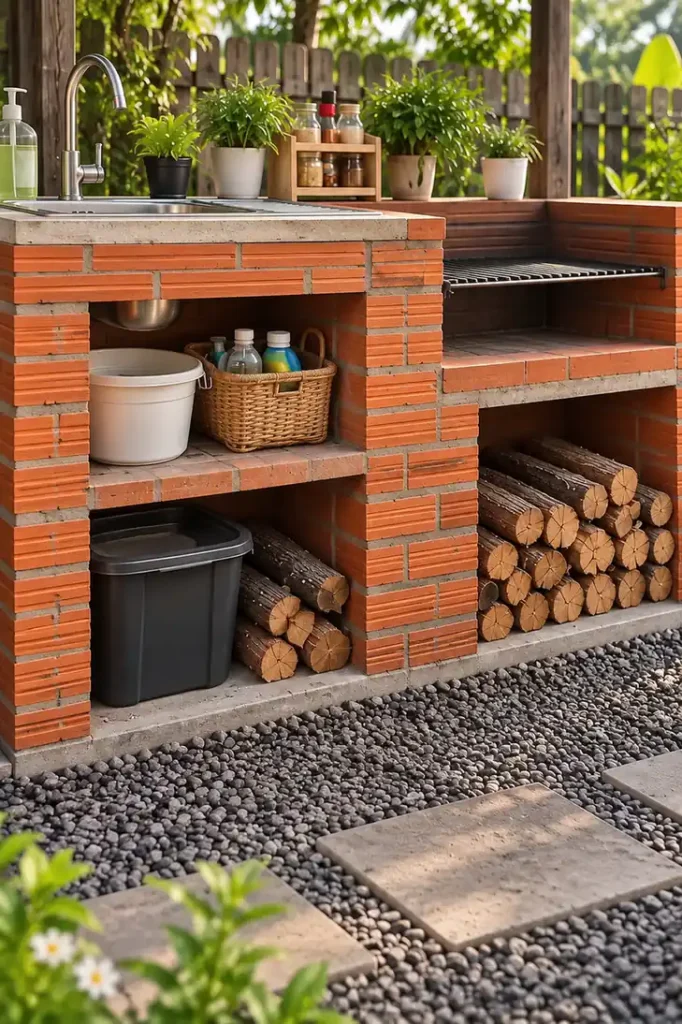
The left end holds a metal sink with a tall curved faucet and a ribbed draining surface beside the basin. Two open storage levels below keep the masonry from becoming one solid block. The center contains a broad rectangular grill opening with a metal cooking grate; a larger open-front bay beneath it provides the visual space for stacked logs.
On the right, the wood-fired stove rises above the main work surface. Its round top supports a cooking pot, while a rectangular opening in the front gives access to the burning wood.
These are two different cooking systems, not two burners sharing one fire. The center grill exposes food to heat from charcoal below its grate. The right stove directs heat toward cookware above its own firebox, which is the chamber where the wood burns to produce cooking heat. That distinction matters when choosing supports, high-temperature materials, and the way smoke and heat leave each section.
When planning for safety and durability, keep in mind that some materials are specifically designed to resist high temperatures; these are called ‘refractory’ materials. The ‘hot-face assembly’ refers to the combination of brick or lining and mortar that will be directly exposed to fire or high heat, which needs to be built from appropriate refractory components. Open bays make the brick base feel lighter and provide useful access, but combustible supplies should not be stored wherever heat or escaping embers can reach them.
Planning Your DIY Brick Outdoor Kitchen Layout
Start with the location, not the footprint. A brick kitchen with charcoal and wood flames needs a genuinely open-air setting and a safe separation from buildings, fences, overhanging branches, pergola timbers, and other combustible features.
As general public guidance, the U.S. Fire Administration advises keeping outdoor fireplaces and fire pits at least 10 feet away from a home or anything that can burn. That is a useful early siting check, not an approved clearance specification for a custom-built masonry stove. Local requirements and the final appliance design may call for more space.
Before you begin, check with your local building department for any required permits and review applicable building codes. This step is important to avert legal problems and ensure your outdoor kitchen is built safely and in compliance with local rules. Review the outdoor fire safety guidance before settling on a location.
Once the site is suitable, select the actual sink, grill grate or approved grill assembly and wood-fired stove system. Work from their installation drawings or physical templates. The outer rim of a sink is not necessarily the size of its countertop cutout, and a grill grate needs a properly supported bearing area rather than an opening guessed from its overall width. Plan for the masonry partitions, countertop edges, heat separation, plumbing access, and comfortable working space. Add the zone widths without counting a shared partition twice.
Loading interactive drawing…
The recognizable arrangement is sink → grill → pot stove, but no single overall length or depth can be assigned responsibly without those component sizes. Also establish where smoke will go. Charcoal and wood can produce carbon monoxide, which is dangerous in enclosed or partly enclosed spaces; a roofed corner or visually open pergola is not automatically suitable for either fire source. Check the actual setting and combustion design rather than relying on appearance alone.
Choosing Brick, Mortar, and Heat-Resistant Substances
The exterior’s warm color comes from orange-red grooved masonry units with gray joints. For a new outdoor build, the visible walls and the interior of a firebox need different material decisions. Exterior brick should suit local rain, moisture, and freeze-thaw exposure. Masonry that directly faces flames and hot coals needs a compatible refractory system, including the right brick or lining and mortar for the anticipated temperatures.
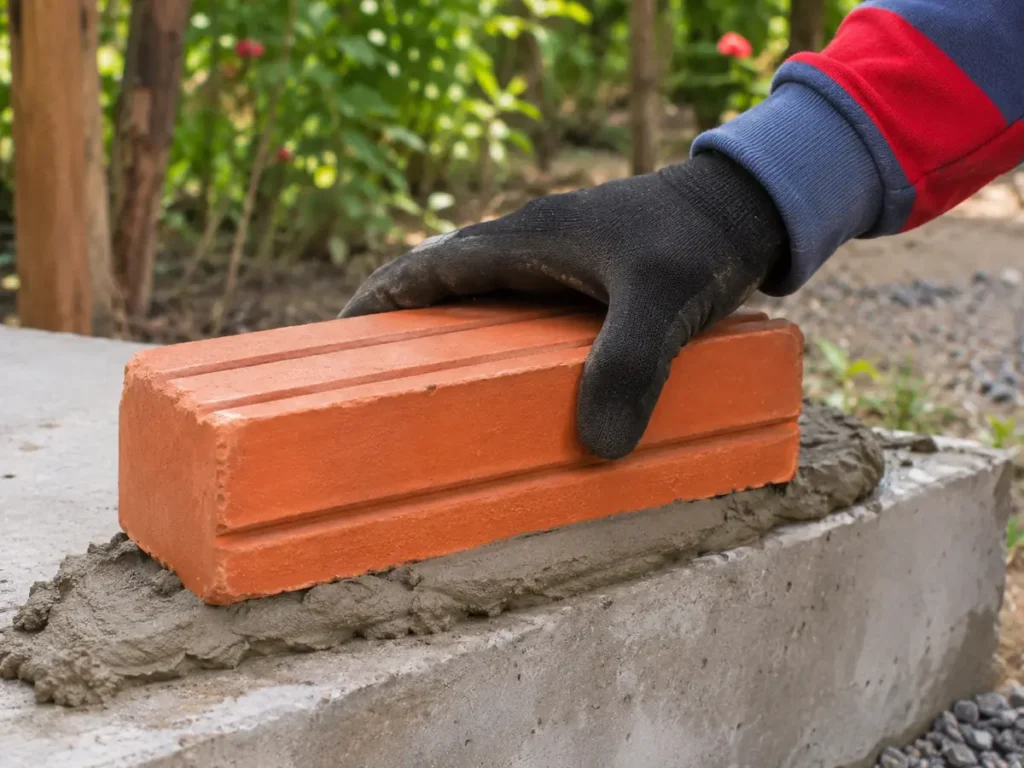
As one example, firebrick made for high-temperature firebox surfaces is sold in a 9 × 4½ × 2½-inch full-size unit. That is a manufacturer’s example for selecting a new liner, not a measurement of the bricks in this kitchen, and it does not determine the right liner thickness for a custom stove. The same manufacturer cautions against using its firebrick as weather-exposed exterior veneer. Choose the hot-face assembly and the exposed facing for their separate jobs.
Make the same distinction with cement-based materials. Ordinary concrete can form structural work surfaces when properly designed, but it should not be assumed suitable as an unprotected flame-facing lining. If a castable refractory product is part of the proposed stove design, read its application and heating instructions carefully.
For example, one castable refractory cement is expressly not intended for direct food contact. Use a suitable cooking grate and cookware rather than allowing food to touch unverified cement or brick surfaces.
For sourcing, most specialized masonry supply stores and large home improvement centers carry firebrick, refractory mortar, and castable refractory cement. These products can also be ordered from online retailers that specialize in fireplace and stove construction materials. Check product details or consult staff to ensure the materials are rated for the temperatures and uses in your specific project.
Forming the Base and Open Brick Storage Bays
The structure of this DIY Brick Outdoor Kitchen begins with a rectangular ground-level base, followed by marked brick positions and successive masonry courses.
Brick partitions create the outline of the sink area, the central grill bay, and the taller stove end. Light-gray horizontal shelves interrupt the brickwork, leaving open-front recesses below the work surface. A level and straightedge help keep the courses and shelf edges aligned as the walls rise.
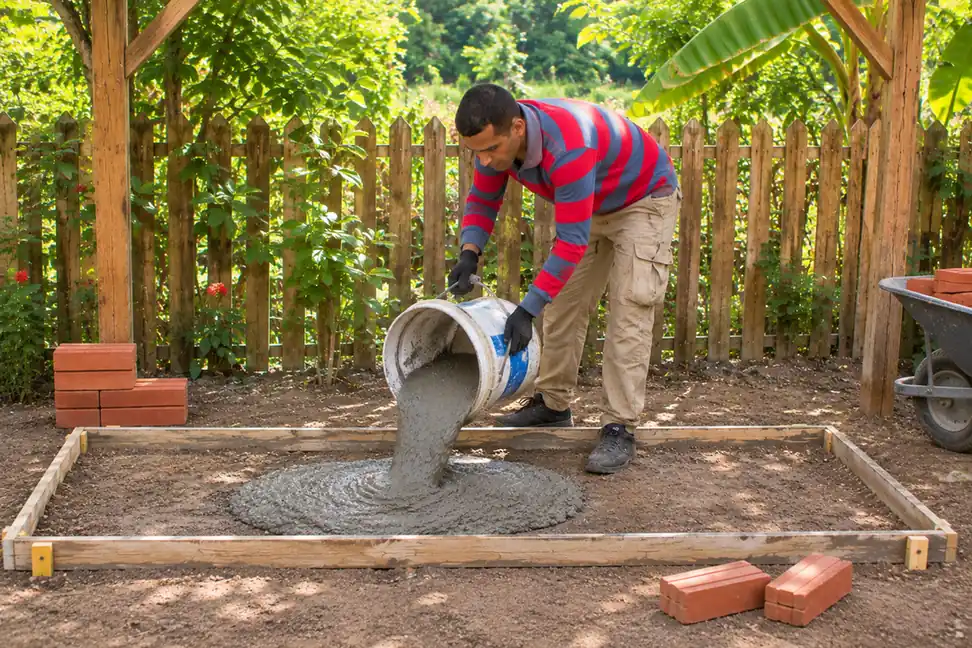
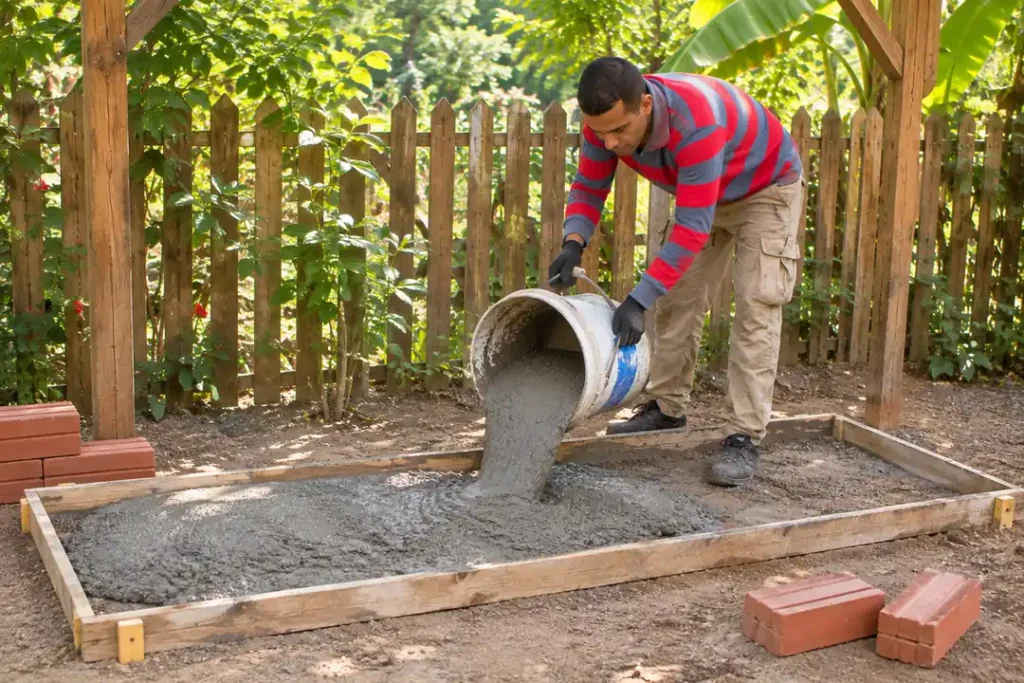
For a new installation, have the foundation sized for the actual soil, climate, and combined weight of masonry, slabs, water-filled sink, grill hardware, fuel, and cookware. Foundation work, including pouring concrete and making sure it is properly reinforced, often requires advanced construction skills, specialty tools, and a clear understanding of local requirements.
If you are not experienced with concrete work or structural design, think about consulting a professional for this phase to help ensure safety and long-term durability. A slab that appears level is not proof that it has adequate support or frost protection. Set out the partitions and all storage openings on the approved foundation plan before laying the first course; changes made after the concrete top is cast are much harder to accommodate.
The open lower bays are part of the design, not spaces to leave unsupported by default. Their widths affect the spans above them and the load path through the brick piers.
The structural design needs to account for those spans, the masonry’s bearing surfaces, and any supports around appliance openings. Positioning firewood beneath a hot cooking section may be convenient visually, but for a new build, move it elsewhere unless the separation and ember containment are specifically designed and verified.
Supporting and Pouring the Concrete Worktops
Above the open bays, temporary timber formwork and adjustable supports hold the upper work area while a gray concrete-like mix is placed. A visible metal reinforcing grid sits within the worktop construction, and the wet surface is leveled. The resulting horizontal surfaces connect the brick piers and frame the sink and cooking openings.
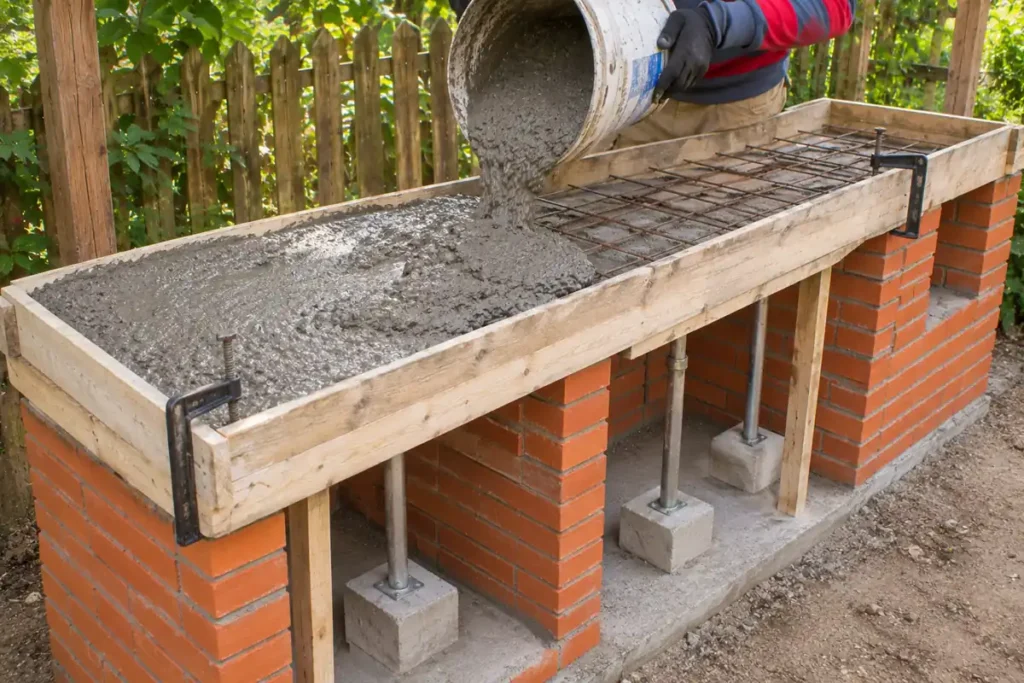
This stage is where appearance and structure can be easy to confuse. A neat top edge does not establish safe slab thickness, reinforcing size, span capacity, or when the temporary supports can be removed. Those details should come from a design for the actual openings and loads.
Use the specified concrete mix and follow its placement and curing instructions; general concrete curing guidance discusses several days of moist curing, but that is not a rule for when this particular slab can carry a grill or lose its props.
Plan hot openings as part of the supporting design, not as ordinary countertops that will simply tolerate a fire beneath them. Where the grill or wood stove meets surrounding masonry, the approved heat-resistant assembly must allow for temperature, movement, and appropriate separation from conventional concrete.
Fitting the Outdoor Sink and Waste Line
The sink sits on the left, with the basin inset into the worktop and a ribbed drainboard extending to its right.
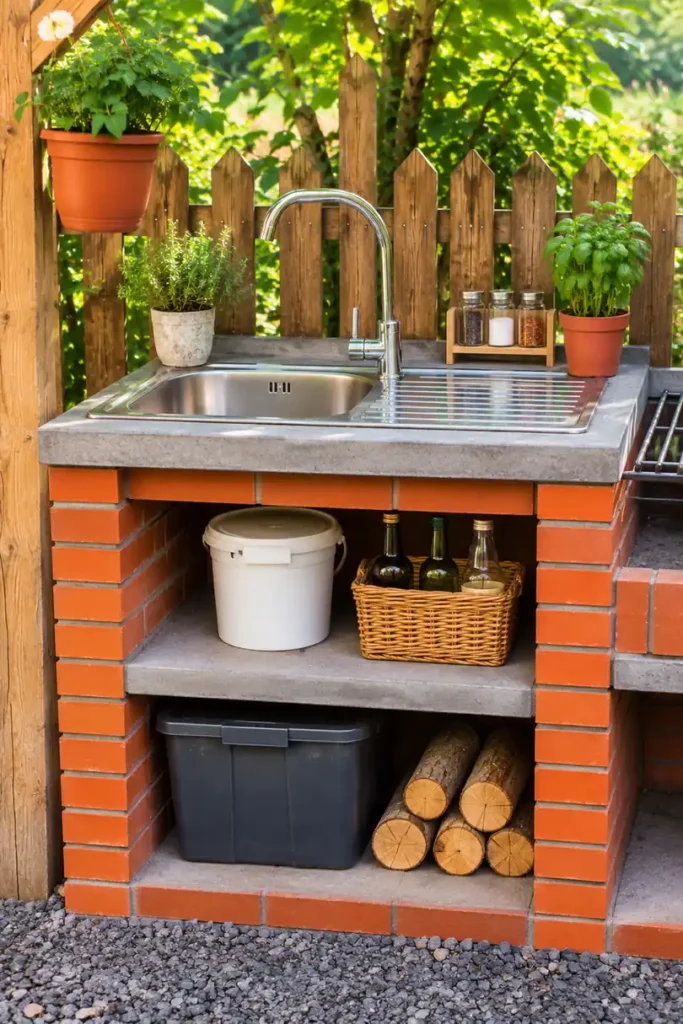
The curved faucet gives this end of the unit the feel of a compact outdoor wash station. The drain connection is accessible from the open space below.
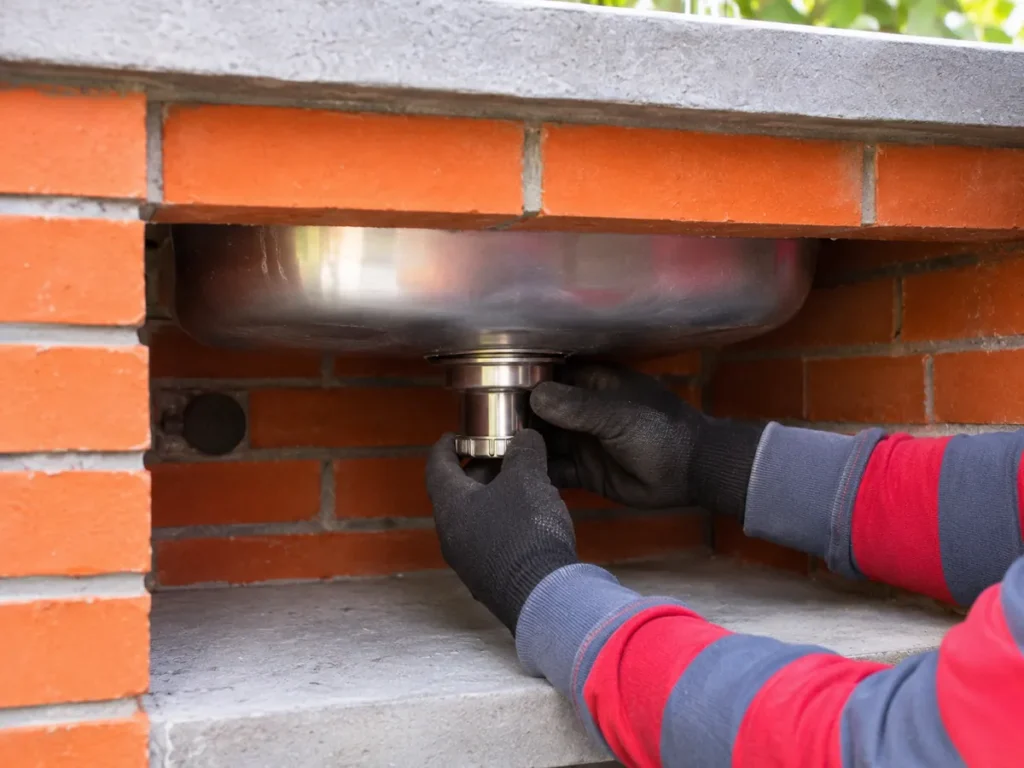
Measure the selected sink and use its supplied cutout dimensions before forming the countertop opening. Check that the rim is supported correctly and that you can still reach the underside fittings after installation. Route supply and waste lines away from the hot grill and stove sections, with accessible connections for repairs and seasonal winterization where needed.
A drain fitting is only one part of a working sink. Decide where used water can legally and safely go before building the surrounding brickwork. Water from food preparation should not simply be assumed suitable for discharge into the gravel or garden; plumbing and wastewater rules depend on location and how the sink will be used.
Setting Up the Charcoal Grill and Wood-Fired Stove
The Central Charcoal Grill
The center is a rectangular opening with a metal frame and a parallel-bar cooking grate.
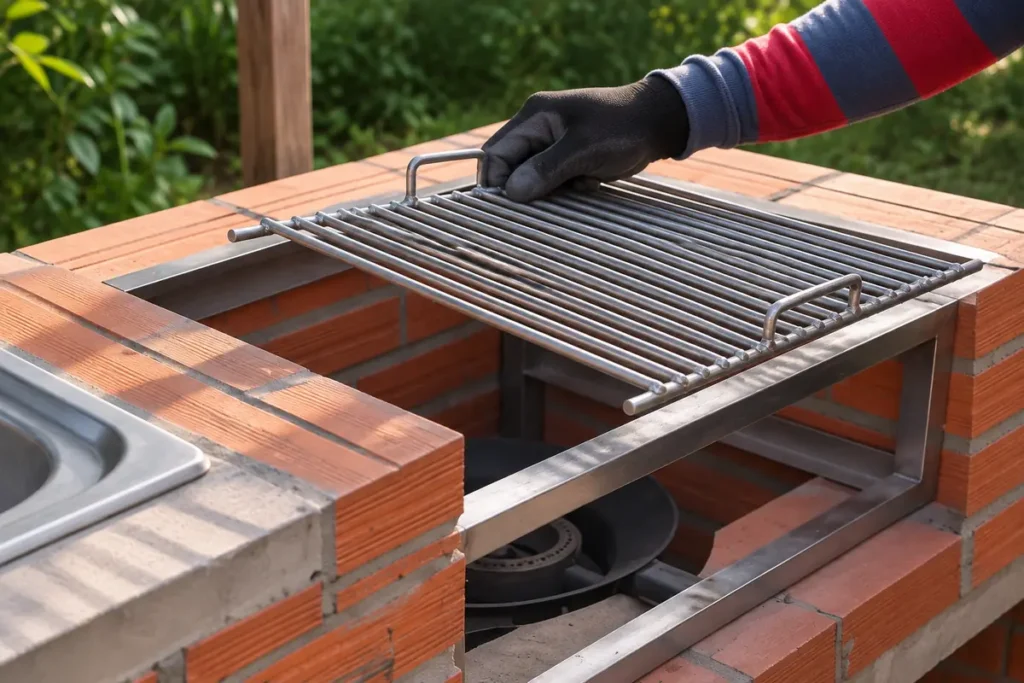
During use, glowing coals are beneath the food. For a new grill section, choose hardware and supporting masonry rated for charcoal cooking, provide a means to manage hot embers and ash, and allow the grate or food-contact components to be cleaned without damaging the brickwork.

Check how the grate bears on the supports while hot as well as cold. A narrow unsupported edge or a metal frame locked tightly against masonry can become a problem as the parts heat and expand. The surrounding structure should be specified for those loads and temperatures rather than sized from the finished appearance alone.
The Round-Top Wood-Fired Pot Stove
The right-hand stove has a raised brick body surrounding one circular pot position. A separate opening in its front feeds the wood fire below the cookware. The metal support around the cooking opening has to carry a filled pot securely while letting heat reach its base.
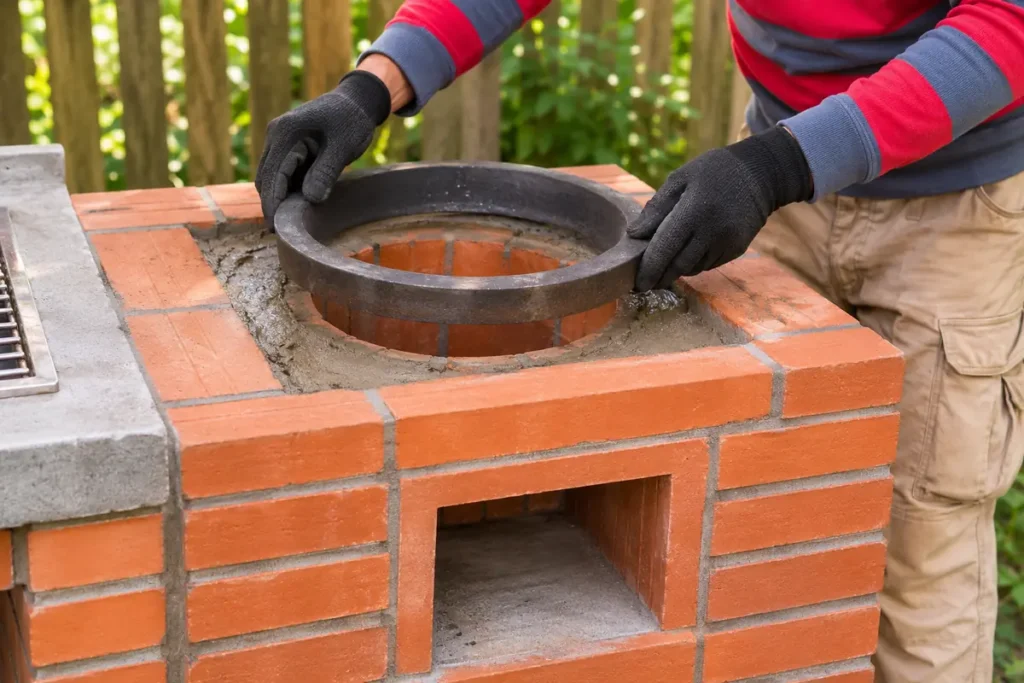
This is the most specialized part of the kitchen. A functional wood-burning chamber needs an appropriate refractory lining, controlled combustion air, safe smoke discharge, a compatible pot support, and protection for adjacent masonry. The necessary internal passages and clearances cannot be determined from the exterior shape.
For a new build, use a professionally designed stove assembly or obtain a qualified design before constructing the fire path. Do not add an improvised flue, seal a chamber, or assume that an open front alone provides safe ventilation.
Burn clean, dry, untreated wood rather than painted, pressure-treated, or waste material. And even outdoors, wood and charcoal combustion can release carbon monoxide; neither fire source belongs in an enclosed or partially enclosed cooking space without an appropriate engineered system. The surrounding timber, hanging utensils, plants, and stored logs also need to remain beyond the verified heat and ember hazard area.
Finishing the Cooking Area With Pavers and Gravel
Light rectangular stepping slabs set in dark gravel lead toward the kitchen. Their straight lines echo the long brick counter and make the open bays and work zones easy to approach. The garden’s greenery and timber fencing add warmth to the red brick and gray work surfaces.
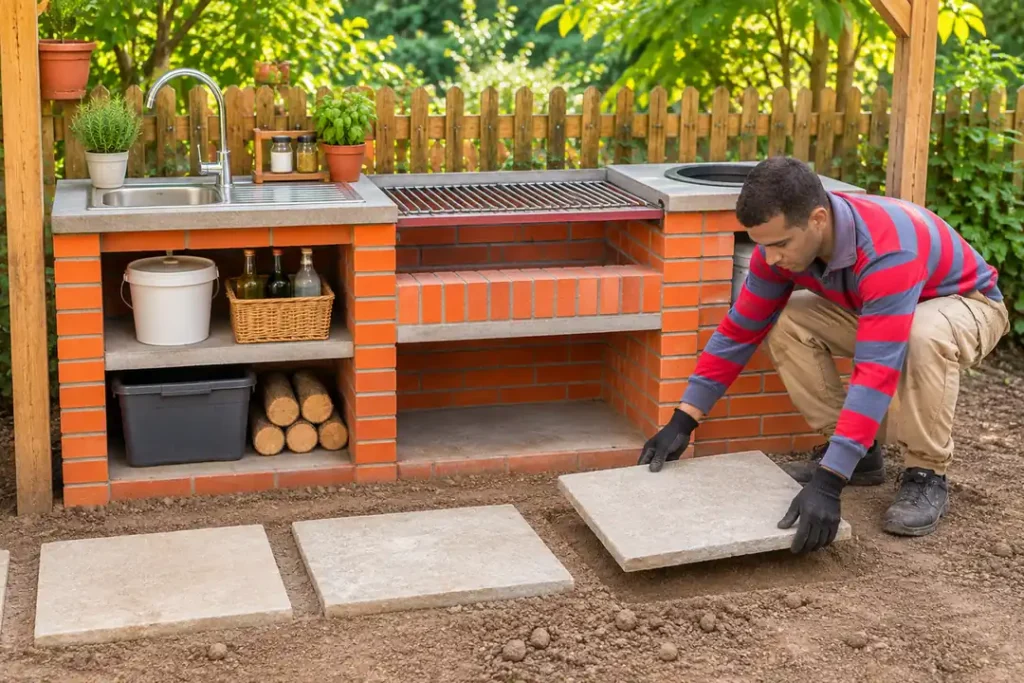
For a similar installation, build the path on a suitable compacted, draining base so the slabs do not rock underfoot. Leave room to stand safely at each cooking position, reach the sink’s service connections, and remove the grate for cleaning. Keep decorative planting and wooden landscape features outside the required fire-safe area; gravel and paving do not make nearby combustible objects safe.
Cooking, Cleaning, and Keeping the Brick Kitchen in Good Shape
The finished station can grill over charcoal at the center while a pot heats over burning wood on the right. Keep the two fires controlled independently, use stable heat-safe cookware, and never leave hot coals unattended. Allow ash to cool completely before moving it to a lidded metal container, and keep that container away from combustible material.
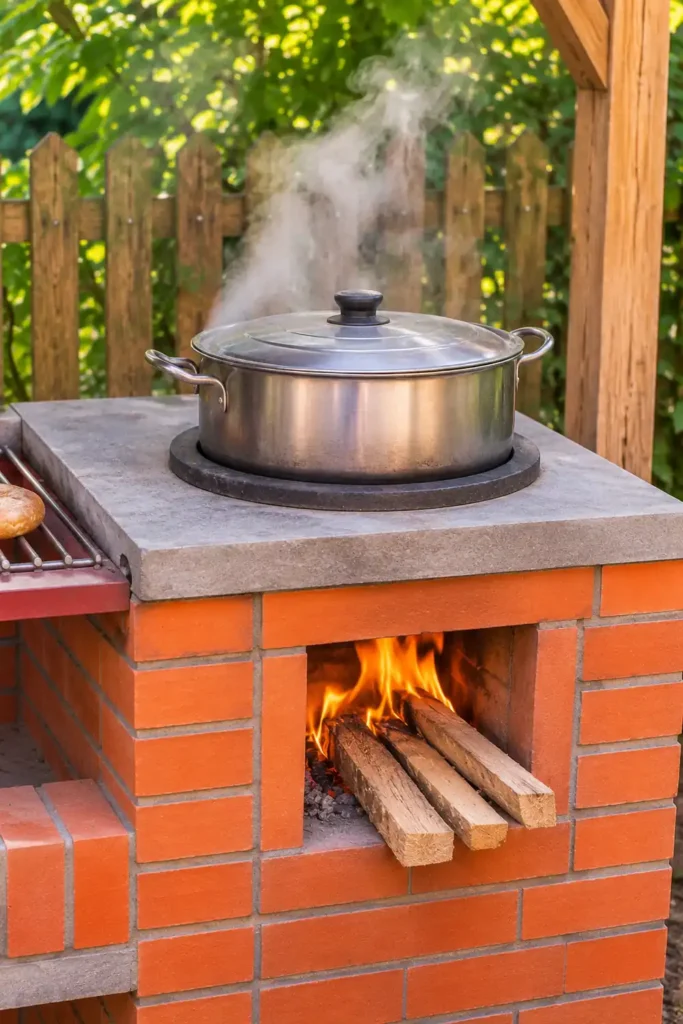
After each cooking session, clean food residue from the grill grate and inspect the pot ring and supports for movement, cracking, or corrosion. Check masonry joints, exposed shelves, and edges around the hot openings for damage; water that repeatedly sits on a horizontal brick surface can shorten its service life.
At the end of each grilling season, perform a more thorough inspection of all masonry and structural elements, including shelves and storage bays, to identify any hidden wear. Repair moisture entry and loose joints promptly, using materials compatible with the particular location and heat exposure. Drain or protect plumbing before freezing weather where applicable. Regular maintenance after each use, combined with a more thorough seasonal check, will help keep the outdoor kitchen in safe and durable condition.
A well-planned DIY Brick Outdoor Kitchen can become a useful permanent feature, but durability depends on the right foundation, refractory construction, weather protection, safe clearances, and continued care—not on brick alone. Preserve the three-zone layout that makes this design so appealing while tailoring the hidden structure and fire system to the actual site and components.