
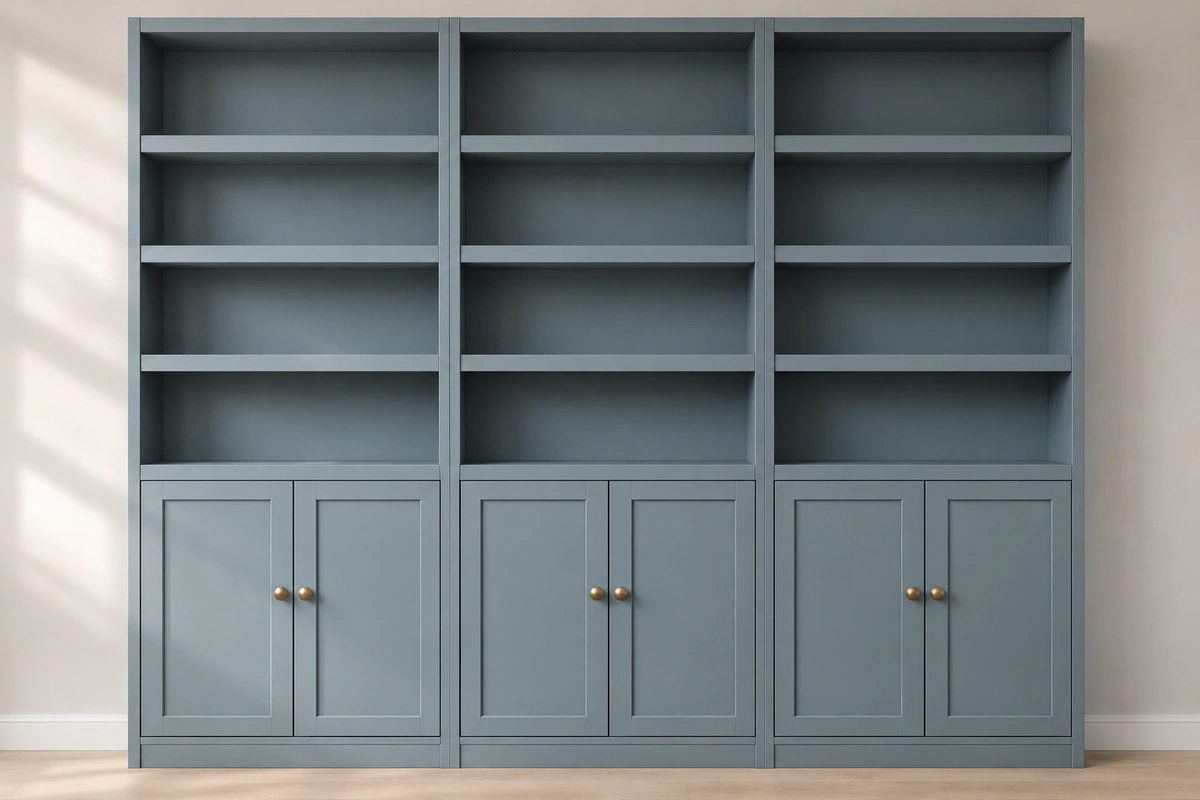
Adding DIY IKEA BILLY cabinet doors to the lower sections of a bookcase wall gives you concealed storage without losing the open shelves above. Pair those doors with thicker-looking shelf fronts, and the whole arrangement starts to resemble custom built-in cabinetry rather than separate flat-pack bookcases.
The trick is getting the proportions and materials right before cutting anything. This guide walks through measuring the bookcases, planning Shaker-style doors, choosing shelf trim, and preparing the parts for assembly and painting. The three-bookcase reference design also includes dimensioned drawings and a 3D model to help you adapt the details to your own space.
Measure the BILLY Units and Plan the Lower Cabinet Zone
Start with the bookcases themselves. The reference design uses three white IKEA BILLY bookcases, model 205.220.46, arranged side by side.
Each unit has a manufacturer-listed size of approximately 31½ inches wide, 11 inches deep, and 79½ inches tall (800 × 279 × 2,019 mm). Together, the three units make a nominal wall arrangement 94½ inches (2,400 mm) wide before any extra surrounding trim.
That gives you a useful starting point, but don’t calculate your cabinet doors from the outside width alone. The door dimensions depend on the actual lower openings, the position of the side panels, and how the hinges will mount.
Before planning the doors, record these measurements:

Before planning the doors, record these key measurements for each bookcase:
– Width and height of the lower openings
– Thickness of the bookcase side panels
– Depth of the bookcase at the lower section
– Position and height of the fixed shelf
– Distance between the side panels and adjacent walls or bookcases
– Any variations between units
Taking clear, labeled notes for each dimension helps ensure that your door and shelf trim plans will fit the assembled units with no unexpected gaps or obstructions. The BILLY includes one stationary shelf and four adjustable shelves. The reference design keeps those original components, using the lower area for concealed storage and the upper shelves for books and display items.
For a similar appearance, keep the transition between the doors and open shelving consistent across all three bookcases. That horizontal line is important: when it runs continuously across the installation, the separate units read more like one cabinet.
The DIY IKEA BILLY bookcase library wall provides a wider look at this built-in approach and how lower cabinets can work with open shelves above.
Gather Materials for the Shaker Doors, Thicker Shelves, and Finish
The door frames, recessed panels, and shelf-front strips all serve different purposes, so choose their materials separately.
Poplar is a sensible choice for painted Shaker frames because it provides a smooth surface and can be cut into consistent rails and stiles. Thin cabinet-grade plywood forms the recessed center panels, while primed pine creates the thicker-looking edges on the upper shelves.
For the three-bay reference design, the main materials and tools are:
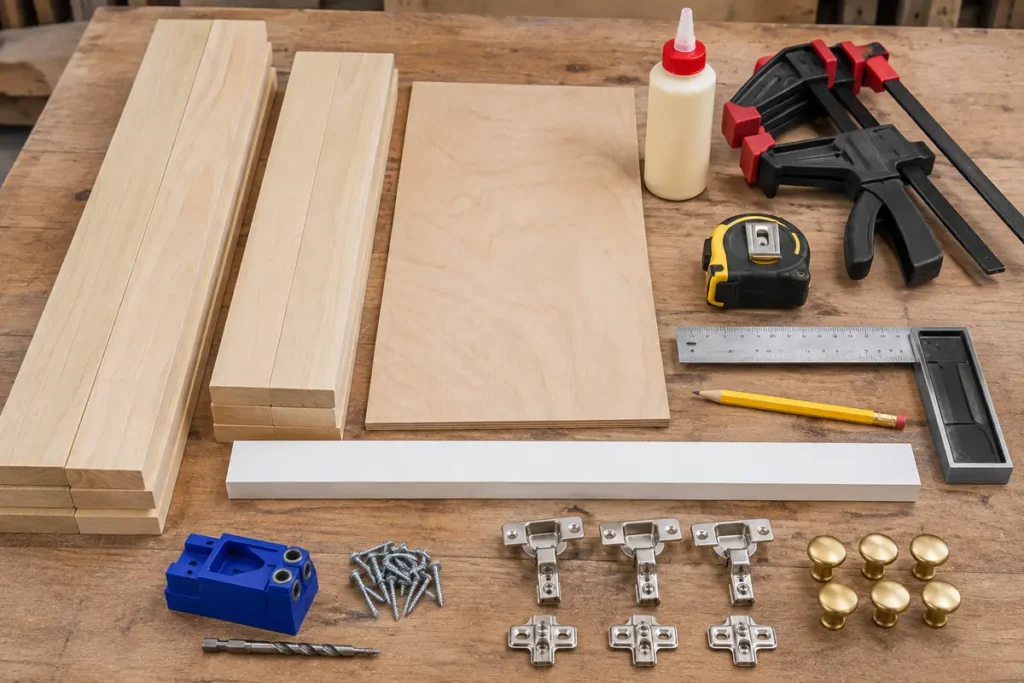
Key Materials and Tools:
– Poplar boards (for Shaker door frames)
– Cabinet-grade plywood (for recessed door panels)
– Primed pine trim (for shelf fronts)
– Blum 71B3550 concealed hinges and 173L6100 mounting plates
– Champagne Bronze knobs
– Pocket-hole jig and screws
– Wood glue and clamps
– Measuring tape, square, and marking tools
– Drill and bits (including 35 mm Forstner bit for hinges)
– Saw for cutting wood components
– Sandpaper and filler
– INSL-X Stix Waterborne Bonding Primer
– Benjamin Moore ADVANCE Satin paint in Boothbay Gray HC-165
– Brushes and rollers
Gather these supplies before you begin, and adjust quantities based on your custom measurements. The selected paint color is Boothbay Gray HC-165, a muted blue-gray that suits the simple Shaker profiles and warm metallic knobs.
For the shelf fronts, the selected primed pine trim has actual dimensions of approximately 0.719 × 1.5 inches (18.26 × 38.1 mm). The wider 1.5-inch face becomes the visible vertical edge, making the shelf appear substantially thicker.
The reference arrangement includes six lower doors, six knobs, and twelve upper shelf-front strips. It also allows for twelve hinge-and-plate pairs, although the final hinge arrangement must be checked against the door dimensions and hardware requirements.
These are reference component quantities, not a completed shopping list. The wood lengths, cutting waste, coating coverage, and final hardware quantities depend on the measurements and installation details you establish for your own bookcases.
Work Out the Door Sizes and Thick-Front Shelf Layout
Once you’ve measured the lower openings, work out how the two doors in each bookcase will share the available space.
Each door needs enough clearance around the edges of each door and between the two meeting doors. The hinge overlay also affects where the doors sit in relation to the bookcase side panels.
Size the Two Doors in Each Bay
The reference 3D model uses doors approximately 15.57 inches wide × 19.72 inches tall (395.5 × 500.9 mm).
Those are illustrative design dimensions, not measurements of a verified BILLY opening. Use them to understand the proportions, then calculate your cutting sizes from your measured opening and the confirmed hinge arrangement.
For the Shaker frames, the reference uses rails and stiles approximately 2¼ inches (57 mm) wide, with a nominal thickness of ¾ inch (19 mm).
The rails fit between the two vertical stiles, creating a rectangular opening for the recessed plywood panel.
The 2D door drawing shows how these parts relate to one another. It’s especially helpful to understand the frame proportions, check the center-panel position, and organize a cut list after your measurements are confirmed.
Keep the frame width consistent across all six doors. Matching rail and stile proportions are what give the lower cabinets their clean, orderly appearance.
Position the Shelf-Front Strips
The upper shelves receive decorative wood strips along their front edges. In the reference design, four visible shelf-front lines are planned for each bookcase, creating twelve strips across the three-bay arrangement.
The trim’s 1.5-inch (38.1 mm) vertical face changes the apparent thickness of the shelves without requiring the existing shelf boards to be replaced.
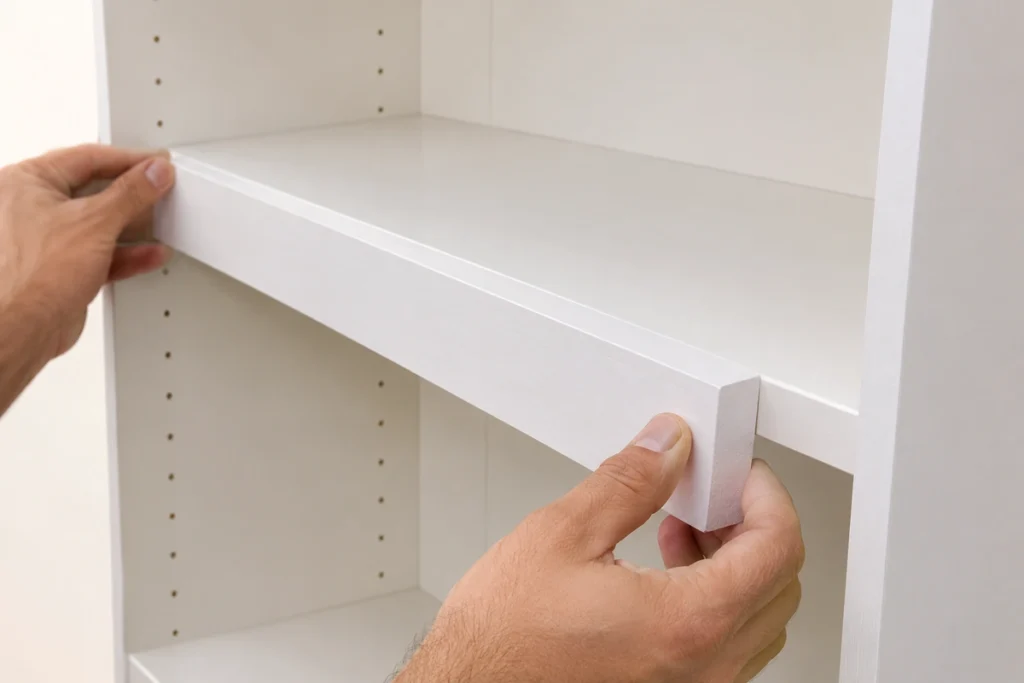
Measure each shelf-front length individually rather than assuming every opening is identical. Keep the existing shelf positions in mind, particularly where the lower cabinet doors meet the first exposed shelf.
The 3D model is useful here because it shows the doors, original shelves, and thicker front edges together. Compare its front view and side view to understand how far the trim projects and how the wider horizontal edges affect the overall appearance.
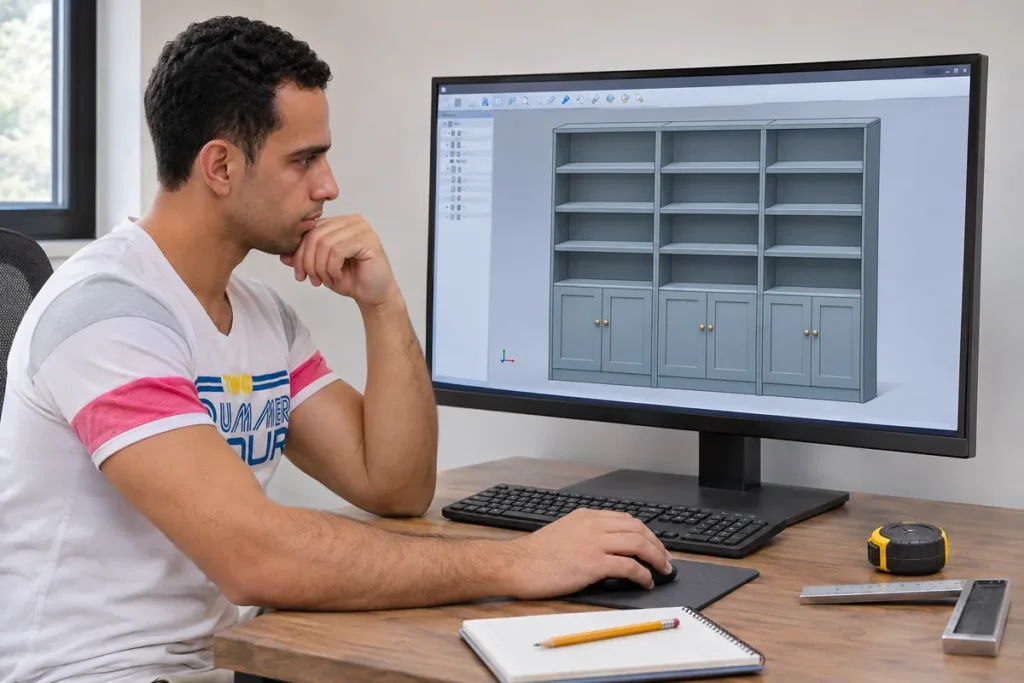
Once the shelf-front lengths and door dimensions are established, you can prepare the custom wood components. Hold off on final door sizing or drilling until the hinge geometry and attachment details have been confirmed.
Assemble the Shaker Frames and Recessed Panels
Loading interactive drawing…
Once the door dimensions have been checked against the actual openings, you can prepare the poplar frames. The Shaker design is simple: two vertical stiles, two horizontal rails, and a recessed plywood panel create a clean cabinet door without complicated decorative profiles.

Pocket-hole joinery is one practical method for assembling the wooden frame. It allows the rails to connect to the stiles from the back, leaving the visible front free of exposed screws.
Work on a flat surface and keep the front faces of the rails and stiles aligned as you assemble each door.

- Mark and cut the frame pieces. Cut two stiles and two rails for each door using the confirmed dimensions. Label matching pieces so the frame parts stay organized.
- Prepare the pocket holes. Use a pocket-hole jig configured for the actual stock thickness. Drill the holes on the back of the rails, positioning them according to the jig manufacturer’s guidance.
- Join the frame. Apply wood glue to the rail ends, bring the pieces together, and secure the joints with compatible pocket-hole screws. Use clamps to keep the front surfaces flush.
- Check the frame for square. Measure diagonally between opposite corners. The diagonal measurements ought to match before you proceed.
- Position the recessed panel. Place the plywood behind the assembled frame and check that it overlaps the opening evenly. The reference design illustrates a 10 mm overlap, but the final panel dimensions and attachment method must suit the confirmed door construction.
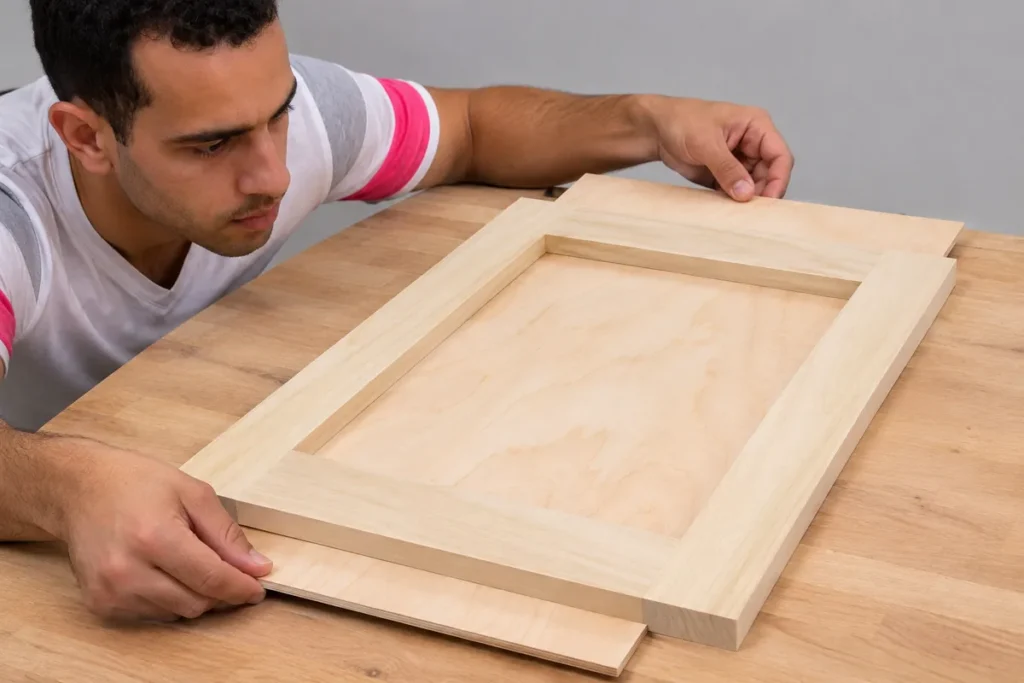
A rear-mounted panel is different from a panel captured inside grooves. It needs an attachment arrangement that holds it in position without interfering with the cabinet hardware. Choose and check that fixing method before permanently attaching the plywood.
Pay particular attention to the outside edges and the joints between the rails and stiles. Any uneven surfaces will become more noticeable after painting.
When all the frames are square, and the panel arrangement has been checked, prepare the wooden components for finishing.
Prepare and Paint the Wood and Factory-Finished Surfaces
Paint helps the separate bookcases, custom doors, and added shelf fronts read as one piece of cabinetry. The important part is recognizing that you’re working with different surfaces.
The poplar door frames and plywood panels are wood products, while the white IKEA BILLY bookcases have a factory-applied paper-foil finish. That smooth factory surface needs a different preparation approach from unfinished wood.
For the reference design, the selected finish is Benjamin Moore ADVANCE Satin in Boothbay Gray HC-165, applied over an appropriate primer. INSL-X Stix Waterborne Bonding Primer is the selected bonding primer for the more difficult-to-coat surfaces.
Start by inspecting and cleaning each component. Remove dust, dirt, and grease, and allow the surfaces to dry completely. Fill minor imperfections in the wooden parts where necessary, then sand and remove the sanding dust before priming.
On the factory-finished BILLY surfaces, avoid aggressive sanding that could damage the thin decorative covering. Follow the primer manufacturer’s surface-preparation instructions and test the complete coating system on a small, inconspicuous area before committing to the visible surfaces. The primer’s documented suitability for difficult surfaces does not establish guaranteed adhesion to this particular paper foil.
If you find that the primer or paint is not adhering well—such as if it scratches or peels off after curing—stop and reassess before proceeding further. Try lightly cleaning the surface again with a degreaser and letting it dry, then retest.
If the issues persist, try different adhesion-promoting primers formulated for laminate or glossy substrates, or consult the paint supplier for additional recommendations. Addressing adhesion problems early will help you avoid problems with the finished cabinetry.
Apply the bonding primer using the manufacturer’s recommended application method and conditions. Stix lists a recoat interval of approximately 3–4 hours under its stated conditions, while ADVANCE Satin lists approximately 16 hours between coats.
Actual drying and recoating depend on temperature, humidity, film thickness, and the product instructions.
For the custom doors, coat the front, back, and exposed edges consistently. Pay attention to the inside edges around the recessed panels, where uneven coverage is particularly noticeable.

The satin finish provides a subtle sheen that works with the Shaker profiles without making the cabinetry look overly glossy. Against the blue-gray paint, the selected Champagne Bronze knobs introduce a restrained warm accent.
Allow the finished components adequate curing time before normal handling and use. Benjamin Moore recommends waiting at least 5–7 days before returning painted shelving to service under its stated guidance, and optimal hardness may take longer.
The aim is a consistent finish across the visible components, with the understanding that the durability of paint on the existing BILLY surface depends on preparation, coating compatibility, and actual adhesion performance.
Check the Mounting Details Before Installing Doors or Shelf Trim
Before attaching the custom doors or thicker shelf fronts, check how the new components will connect to the existing BILLY bookcases. This is the point at which accurate measurements and compatibility of the hardware matter more than the appearance of the finished cabinet.
The reference design uses Blum 71B3550 concealed hinges with Blum 173L6100 mounting plates. The hinge specifications include a 35 mm cup diameter and a 13 mm cup depth, but those measurements alone do not establish the correct drilling positions or prove that the hardware will work with the BILLY side panels.
The shelf-front strips also need an attachment method compatible with the existing shelf material and factory finish. For BILLY shelves and primed pine trim, strong construction adhesives such as Liquid Nails Small Projects or Gorilla Heavy Duty Construction Adhesive (clear) work well for bonding wood to the melamine-like BILLY surface.
For a more reversible solution, thin gauge brad nails (18 gauge, approximately 5/8 to 1 inch in length) can be used in addition to adhesive to help hold the strip in place until the glue sets. If using brad nails, angle them slightly downward and pre-drill through the pine to avoid splitting the trim. Avoid screws, as the BILLY shelf core is made of particleboard and may not hold fasteners securely. Always test adhesives on a scrap or inconspicuous area first to confirm good adhesion. Their decorative role does not establish the strength of a particular adhesive or fastener.
Before permanent installation, resolve these details:
- Door hinge placement: Check the actual side-panel thickness, hinge mounting surface, door overlay, mounting-plate position, and required drilling locations.
- Door movement: Confirm that both doors in each opening can swing without contacting one another, the adjacent bookcase, or the projecting shelf trim.
- Shelf-front attachment: Establish a fixing method compatible with the shelf substrate, trim material, and the intended application. Check that the added profile does not interfere with the doors.
- Bookcase anchoring: Identify the wall construction and suitable fixing locations. IKEA requires the BILLY bookcases to be secured against tipping, and the appropriate wall screws and plugs depend on the actual substrate.
- Installation alignment: Check the position, level, and plumb of the bookcases before establishing the final door gaps and hardware locations.
The dimensioned drawings and 3D model help explain these relationships, but their illustrated hinge positions and connection details are not verified installation instructions.
Use the hardware manufacturer’s fitting information and the actual bookcase measurements to establish the attachment arrangement. Where wall construction or fastening suitability is uncertain, have a qualified installer review the proposed connection before drilling or mounting.
Once these decisions are supported by the actual components and installation conditions, you may proceed with the appropriate fitting method rather than relying on the reference model alone.
Keep the Lower Storage Useful and the Upper Shelves Open
The most useful part of combining Shaker-style cabinet doors with open BILLY shelving is the separation between everyday storage and display.
The lower compartments provide a place to conceal items that don’t need to remain visible, while the upper shelves keep books and decorative pieces accessible. This gives the cabinetry a more organized appearance without turning the entire bookcase wall into closed storage.
The thicker shelf fronts help connect the two areas visually. Their wider horizontal edges give the open shelves more presence, balancing the solid appearance of the lower cabinet doors.
For a consistent finish, keep the Shaker frame proportions, shelf-front profiles, door gaps, and hardware style coordinated across the bookcases. The muted blue-gray paint and brass-finish knobs work together without requiring additional decorative moldings.
When arranging the upper shelves, use the existing shelf positions and follow the bookcase manufacturer’s loading guidance. Don’t assume that adding decorative wood to the front increases a shelf’s structural capacity.
The reference design uses three bookcases, but the same visual approach can be adapted to a smaller or larger arrangement. For different spaces, you can easily customize the plan by adjusting the number of BILLY bookcases to fit your wall width, or by using narrower or wider BILLY units in various combinations. When adapting for different BILLY sizes, recalculate all door and trim measurements from your new bookcase dimensions and take special care to keep the horizontal line where the doors meet the open shelving consistent. Whether you use two, four, or more bookcases, the important thing is to maintain a unified style and a smooth transition between closed and open storage.
With the cabinet doors and shelf fronts planned as one design, ordinary BILLY bookcases can take on the proportions and appearance of custom cabinetry while retaining the practical storage arrangement that makes them useful.