
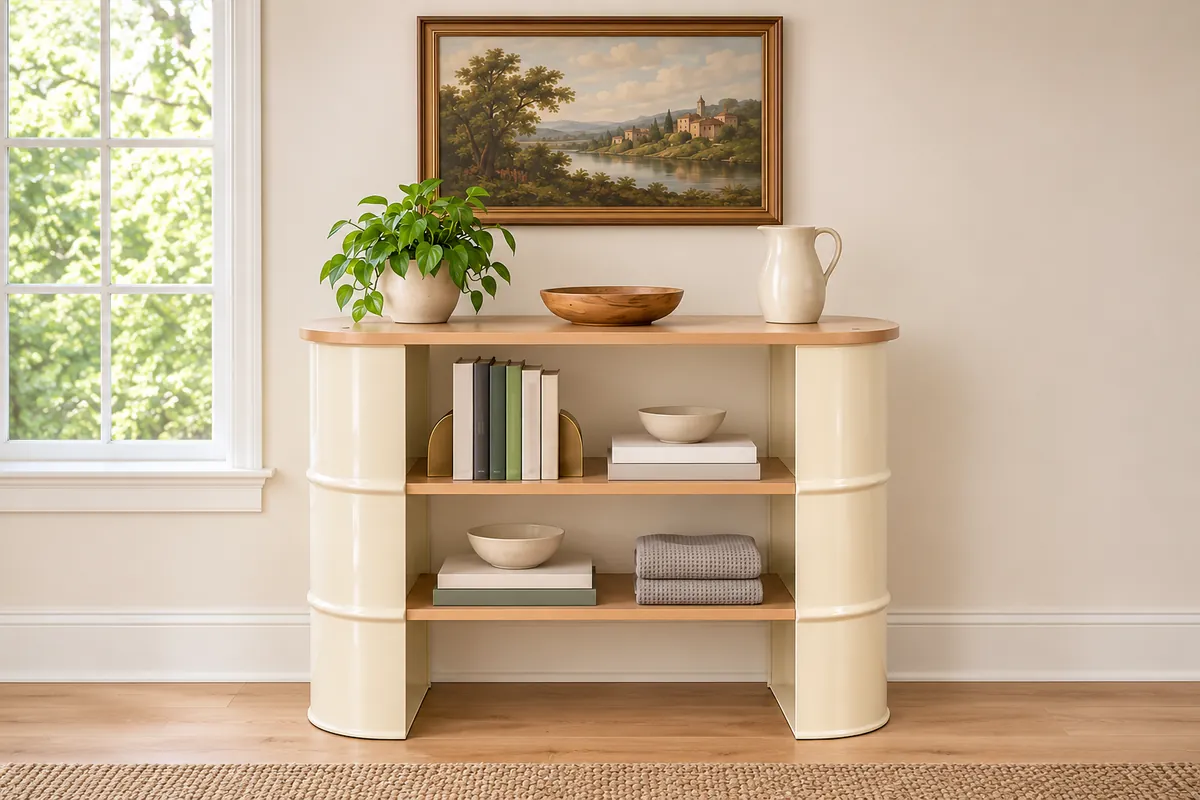
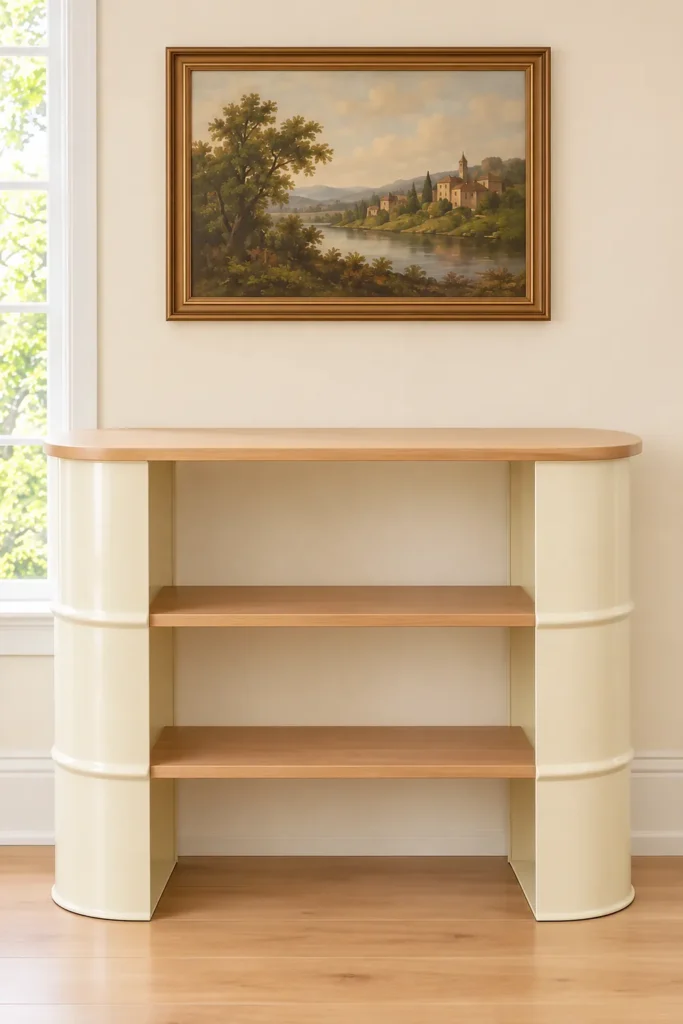
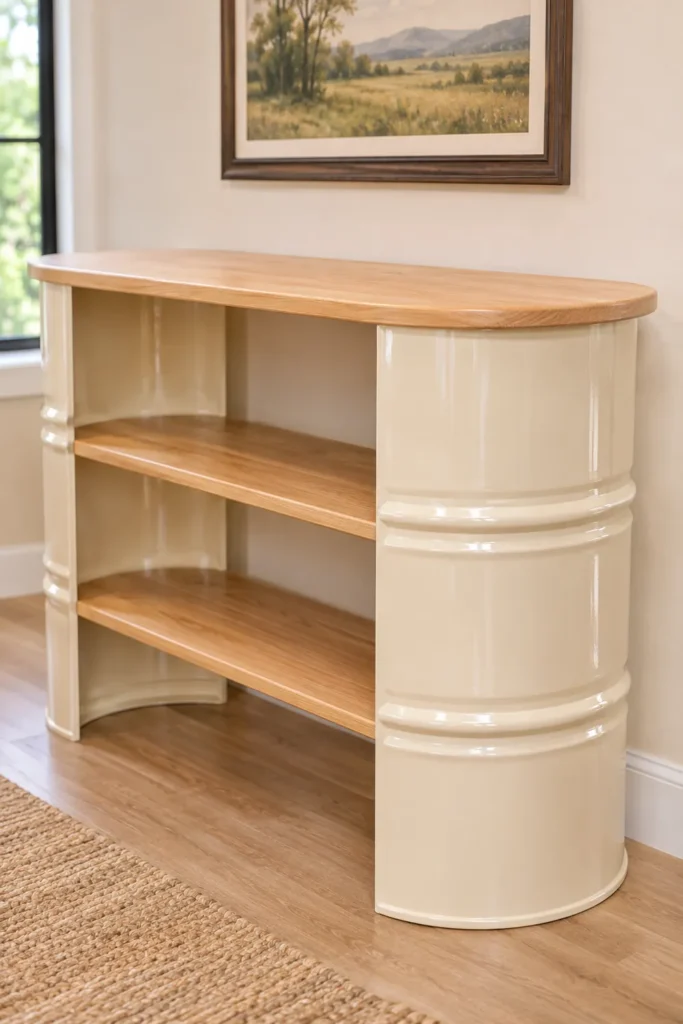
A Steel Drum Console Table turns the curved sides of an industrial barrel into the sculptural ends of an open-shelf credenza. Instead of hiding the steel, this design lets its rounded profile and raised ribs frame two light wood shelves beneath a wider, softly rounded top. The contrast is what makes the piece interesting: familiar workshop material becomes furniture that feels at home in a bright, neutral room.
The finished console has two ivory-colored curved end supports, two interior shelves, and one broad wooden top. Its front remains open, with a clear gap between the lowest shelf and the floor. It is a display-focused design rather than an enclosed cabinet with doors or drawers.
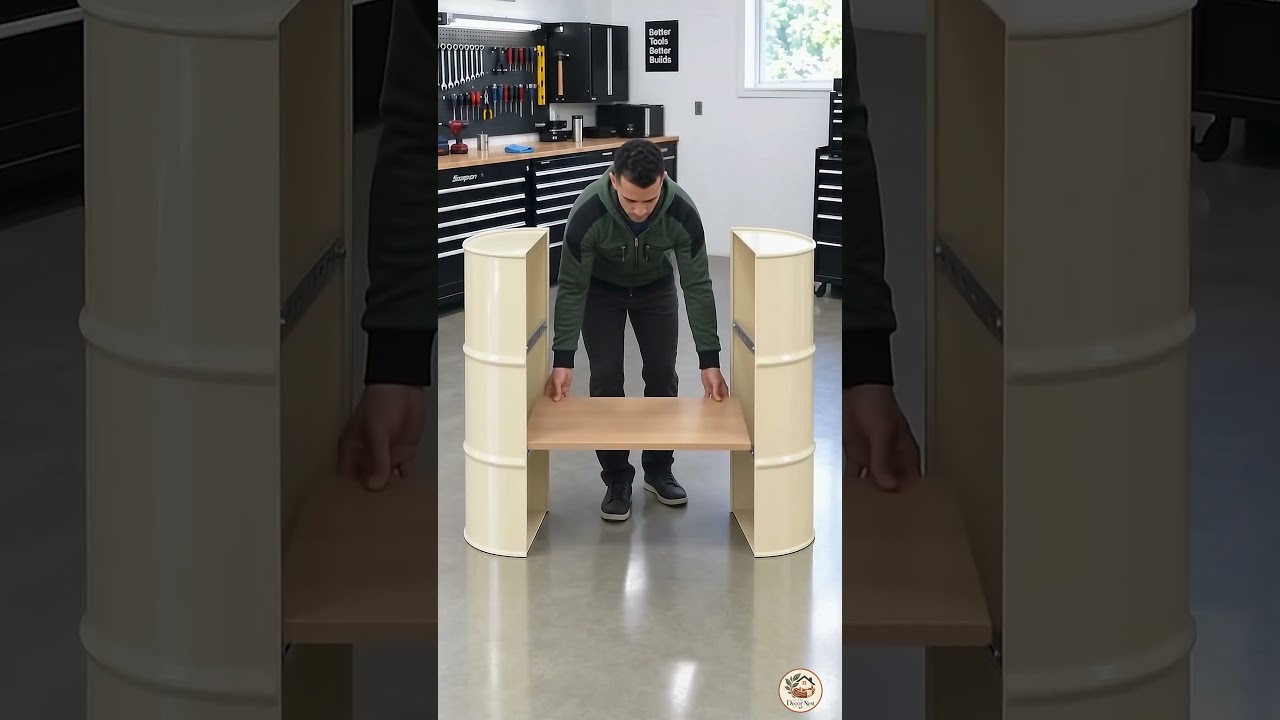
How Two Half-Drum Sides Shape the Console
The defining idea is to use the two long halves of a cylindrical steel drum as opposing upright ends. Their rounded exterior surfaces face outward, while their open sides face the shelving space. This creates a distinctive curved shape without adding ornamental legs or covering the original one-barrel shape.
The drum’s raised circular ribs become horizontal bands on each side column. Finished in pale ivory, they add subtle texture instead of looking industrial or heavy. Straight, wood-look shelves bridge the gap between the rounded ends, and the top extends farther across the supports with gently curved corners.
This arrangement depends on the side pieces standing in alignment and the shelves connecting them securely. The attractive silhouette is a starting point, not proof that thin drum walls alone can carry furniture loads.
Depending on the way you plan to use the console, adding reinforcement may be necessary for safety and durability—such as using steel backing plates at shelf attachment points, installing internal wooden or metal frames, or fitting brackets that help distribute the load across a greater area of the drum sides. Considering these reinforcement options during the design stage helps ensure the finished piece will be both stable and reliable.
Choose a Safe Steel Source Before Fabrication
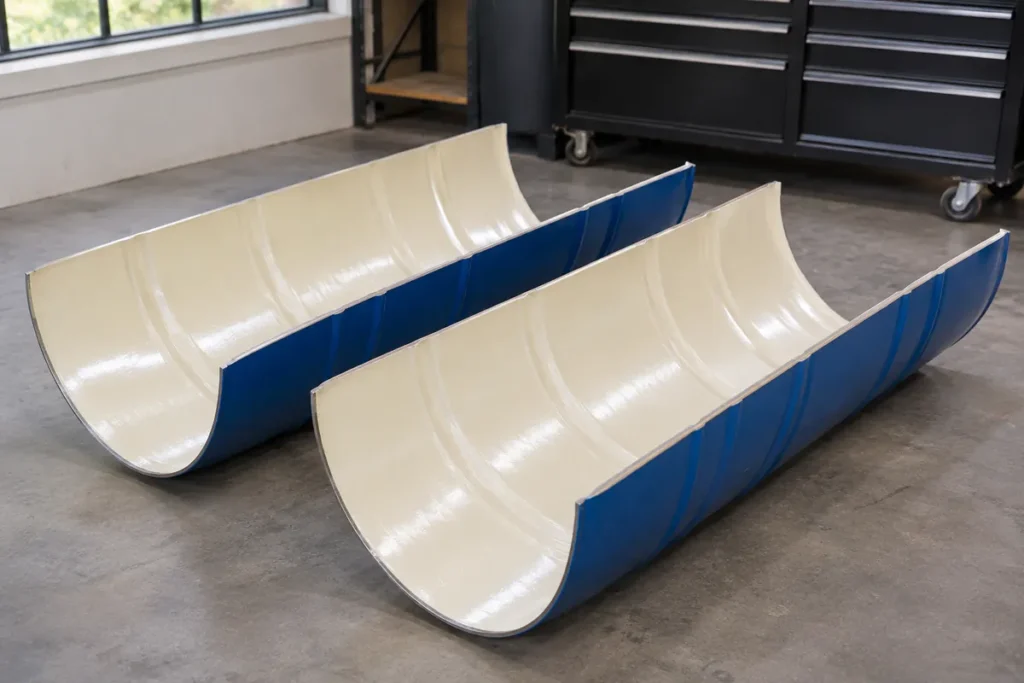
For a new build, select the steel source before deciding how to shape it. Never use a grinder, torch, or another spark-producing tool on a used drum with unknown contents or preparation history. A container can look empty while retaining hazardous vapors or residues. Hot-work precautions for used drums and containers require appropriate assessment and preparation; simply removing the lid or rinsing a barrel is not a substitute for professional controls.
An identifiable, unused, clean steel drum or professionally prepared pre-cut steel shells are more sensible starting options for this furniture concept. Suitable drums can sometimes be sourced from metal supply retailers, local industrial supply or salvage yards, recycling centers, or through suppliers specializing in food-grade or new industrial containers.
Some online marketplaces also offer unused or surplus drums, but consistently verify the condition and history before purchase. Even then, a qualified metal fabricator should assess the particular material, any lining or coating, safe cutting method, and whether the resulting parts need structural reinforcement. A drum manufactured to hold contents is not automatically suitable as a furniture frame once split open.
Cut sheet metal also needs attention after fabrication. Have the exposed edges deburred and made safe to touch, and protect them with a suitable finish or edge treatment. Check the base contact areas so the metal cannot scratch the floor or rock on a raised seam.
Position the Curved Ends and Measure for Two Shelves
The Steel Drum Console Table works visually because the end columns are separated enough to create a useful open span without losing the strong, barrel-shaped outline. There is no universal shelf-cut length for this design: it depends on the real drum sections, their orientation, and the selected supports.
For your own build, place the prepared halves on a level surface and check that each stands upright with dependable contact at the bottom. Decide on the overall spacing and the two shelf elevations before cutting wood. The columns must remain square to one another and resist twisting; temporary positioning alone is not a permanent structural connection.
Once you have the supports in place, follow a step-by-step approach to measuring and fitting the shelves to ensure accuracy and avoid mistakes:
1. Mark the intended shelf positions on the inside surfaces of the steel drum ends, using a level to keep your marks consistent from front to back.
2. Dry-fit the steel drum halves on a level surface and temporarily position the chosen supports, checking that everything stands upright and is square.
3. At each intended shelf level, measure the clear span between the inner surfaces of the metal ends, both at the front and back where the steel curves. Note any differences that could affect shelf fitting.
4. Measure the available shelf depth (front to back) at both ends, accounting for any curves or ribs that might limit usable space.
5. Check all measurements before marking and cutting your shelf boards. Allow for any clearance needed by mounting hardware or to avoid shelf edges snagging on ribs, fasteners, or uneven points inside the drum.
6. Only cut the boards after confirming all measurements against the actual setup, not just a drawing or plan.
By using these ordered steps, you can ensure an accurate fit for each shelf and avoid having to re-cut materials due to disregarded details.
Loading interactive drawing…
If the two measured spans differ, correct the alignment or fit each shelf to its own position rather than assuming the panels are interchangeable. The desired load, wood product, thickness, and unsupported distance also affect whether a shelf needs reinforcement.
Make the Shelf Connections Dependable
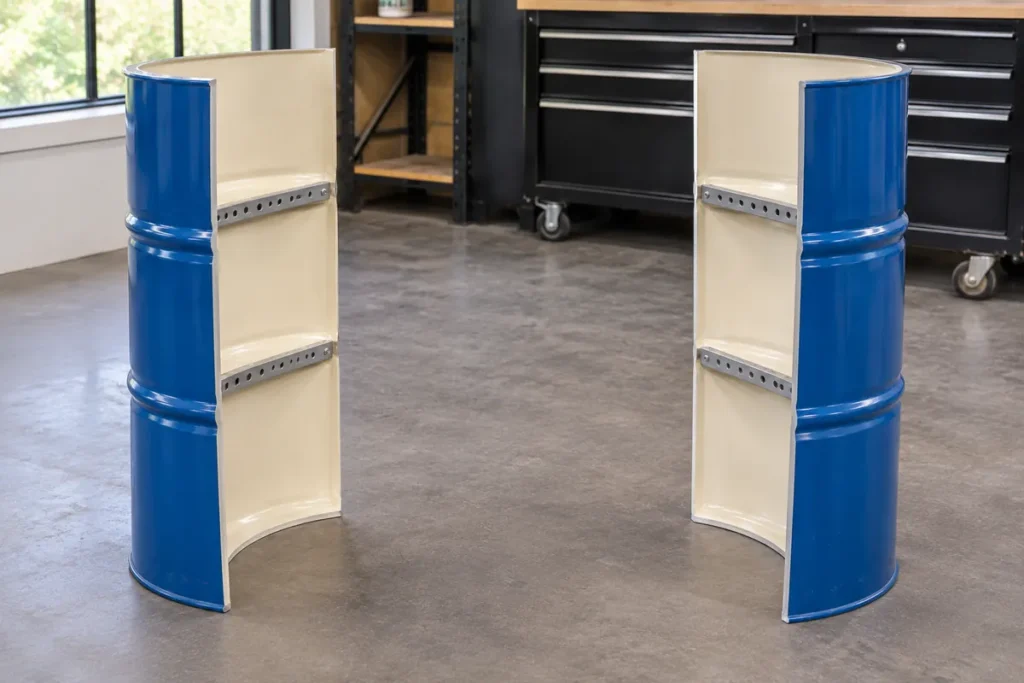
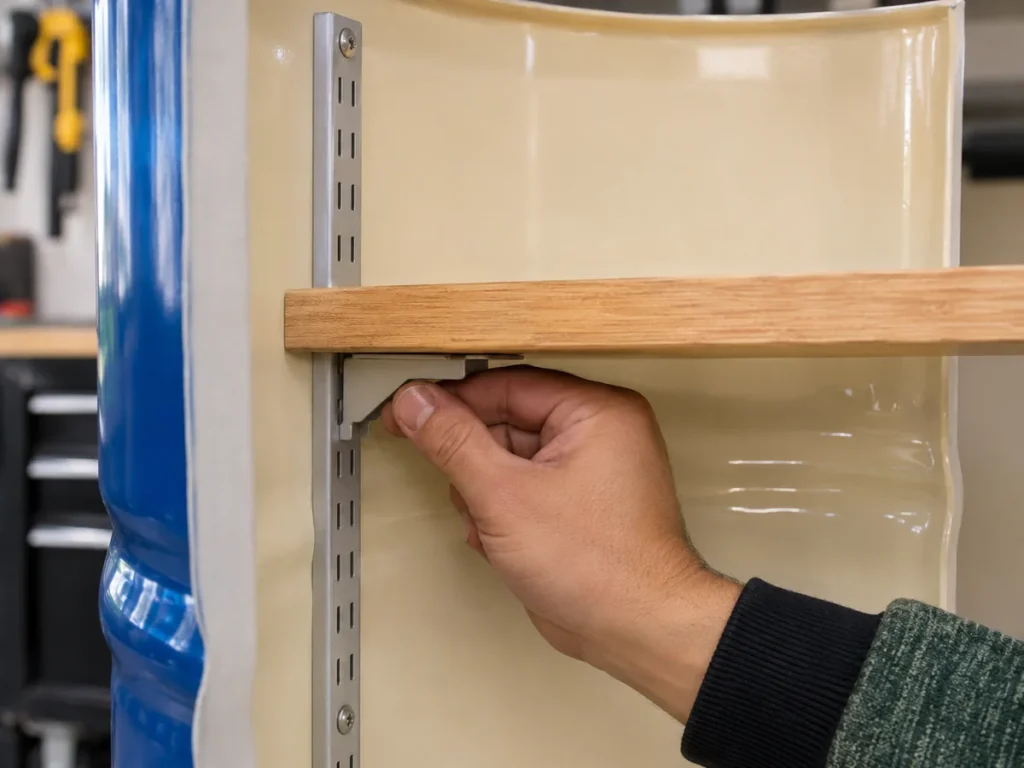
Slotted metal tracks and shelf brackets can make the interior shelves easier to position, but the complete connection counts more than the appearance of the hardware. When working with curved, thin sheet-metal shells like steel drums, consider hardware designed for this material.
For example, using rivet nuts (also called threaded inserts for metal) can provide strong threaded anchoring points in the steel and work well with machine screws for shelf supports.
Through-bolts with washers on both sides can help distribute the load and prevent deformation of the thin metal. For adjustable shelves, low-profile shelf support brackets paired with slotted tracks secured using rivet nuts or small backing plates inside the drum can offer both adjustability and strength.
Be aware that a bracket rating intended for secure installation into a wall cannot be transferred to a curved steel shell simply by using the same bracket, so always size your fasteners and reinforcement based on the specific application.
For a practical new version, select one compatible shelf-support arrangement and determine how its fasteners transfer load into the steel. Depending on the measured sheet thickness and the desired use, that may call for engineered backing plates, reinforcement, or a discreet internal supporting structure. These are design options to evaluate, not confirmed details of the first console.
Before committing to a finish, dry-fit the two shelf levels and check that each board sits fully on its intended supports. Confirm the joints do not loosen or distort the shell and that the side columns cannot rack sideways. A subtle rear connection may be useful in a redesigned version if the shelves and ends do not provide adequate stiffness, but it should not be mistaken for a visible feature of this open-backed piece.
Bring Together Ivory Steel and Warm Wood
The change from blue barrel steel to soft ivory is central to the furniture’s character. It keeps the curved ribs visible while letting the supports blend with light walls and pale flooring. The wood-look shelves introduce a warmer surface between the cool metal ends.
When finishing a new piece, inspect the actual coating and metal condition first. Clean and prepare the surface according to the chosen coating system. Where priming is needed, select a product suited to your specific steel and existing liner: for example, epoxy primers provide excellent adhesion and corrosion protection for both bare and coated steel, while self-etching primers can help bond to clean, untreated metal surfaces.
If you are working with lined or previously coated drums, look for primer types labeled to bond to those surfaces or consult with the coating supplier about compatibility. Always follow the manufacturer’s application and curing directions. Avoid assuming that a coating suitable for bare steel will adhere properly to an unknown factory liner or old paint.
Choose a wood or wood-look panel finish that works with the ivory rather than competing with it. A pale oak-like tone offers gentle contrast; a clear or light finish can help the tabletop and shelves read as one coordinated set. Seal or finish exposed board edges as appropriate for the chosen material, particularly where people may touch them or set down damp objects.
Fit Two Wood Shelves and Secure the Rounded Top
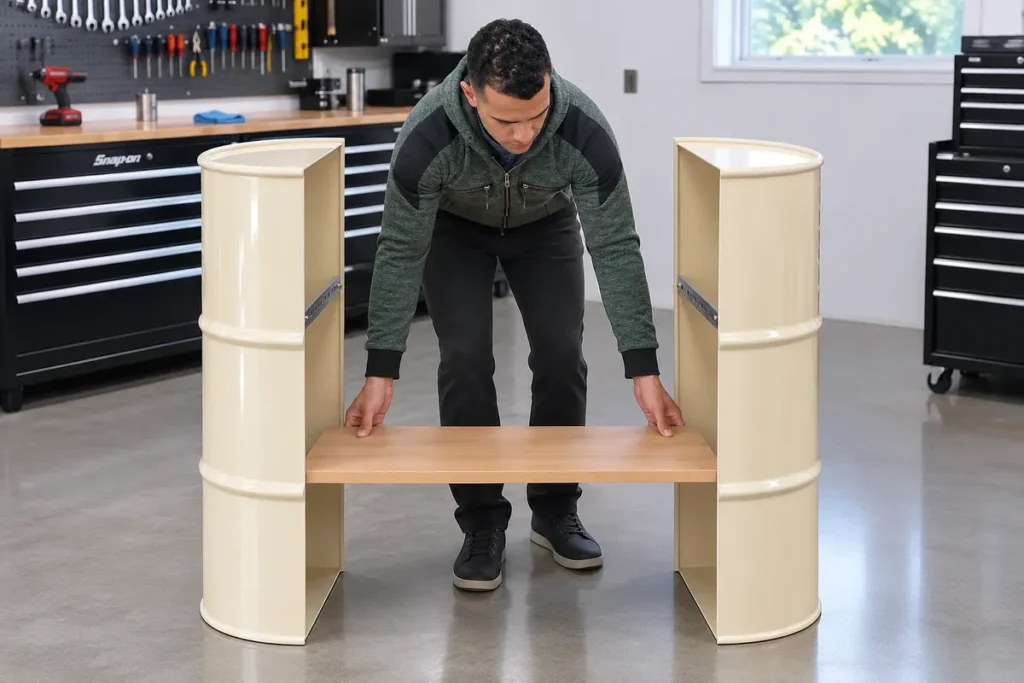
The console has two narrower interior shelves, one above the other, plus one separate, wider top. Keeping these three horizontal surfaces distinct is important: the top gives the piece its credenza-like outline, while the two shelves provide the open display area.
For a new assembly, position each shelf on its verified supports and use the connection method specified for the chosen hardware and structure. Check front-to-back level and make sure the shelf cannot slide off its supports during normal use. Do not rely on paint, friction, or decorative trim as a structural attachment.
Center the broad top over both side columns and check the overhang from each end. Its softly rounded corners help the otherwise straight wood surface echo the steel curves. The top needs positive mechanical retention to the supporting structure, with reinforcement where necessary; resting it on the two shells is not a dependable fastening method.
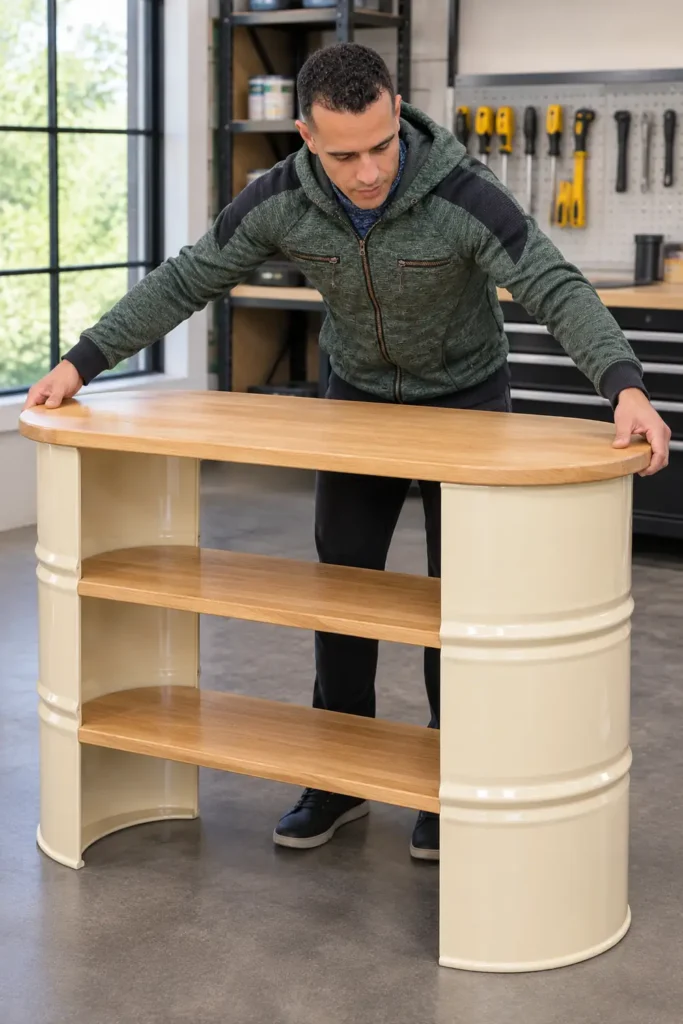
If you choose a true solid-wood top, design the connection to allow for seasonal movement across the grain. Tabletop attachment methods that permit wood movement can guide the wood side of the detail, but they still need a properly engineered attachment to the metal supports. Manufactured wood panels may have different fixing requirements, so follow the panel supplier’s guidance instead of treating every wood product alike.
Style the Steel Drum Console Table and Check Its Stability
The open layout lends itself to a few deliberately chosen accessories. A trailing green plant, low wooden bowl, or simple ceramic pitcher adds a natural note on the top without hiding its rounded shape. Books and shallow bowls fit the upper shelf, while folded linens or a small stack of decorative pieces suit the lower one. Leave some clear space so the two curved ivory ends remain the focus.
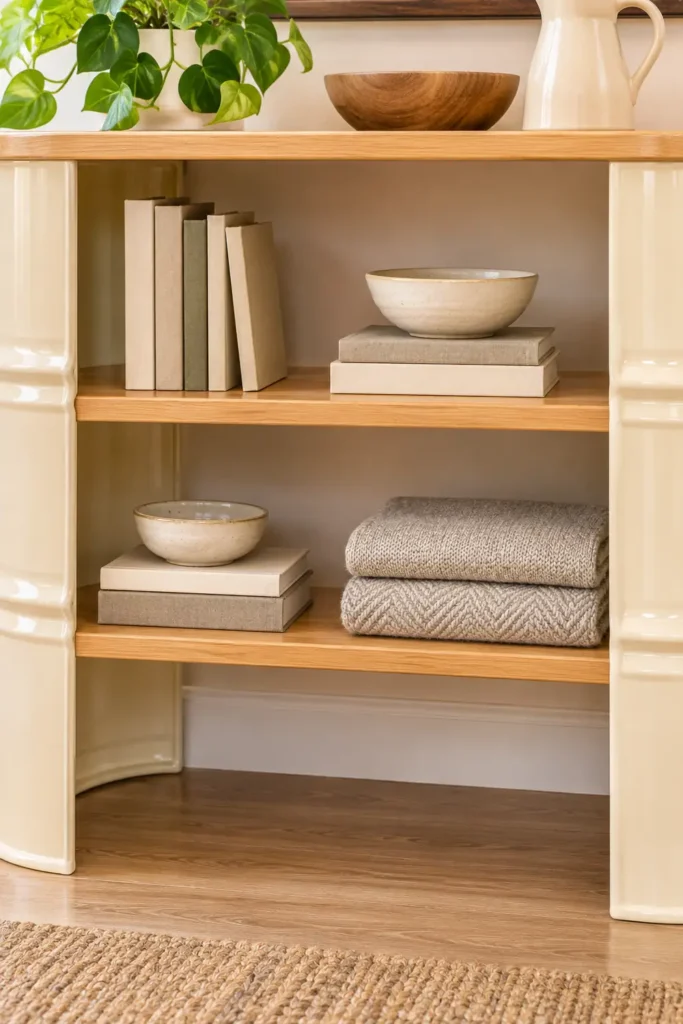
The gap beneath the bottom shelf also matters visually. Keeping it open makes the console feel lighter and makes the authentic barrel-half silhouette easier to recognize. In an entryway, living room, or dining area, give the rounded ends breathing room rather than wedging them tightly between larger cabinets.
Treat styling as separate from structural capacity. Before putting the furniture into service, have the assembled frame, shelf connections, top fixing, floor contact, and resistance to tipping assessed for its intended loads and location. Keep heavy objects off unverified shelves. Where children can access the unit, consider a properly selected wall restraint and keep tempting climbable items out of reach; furniture tip-over prevention guidance is particularly relevant to freestanding pieces.
With its two curved steel ends, warm wood surfaces, and uncluttered open shelves, this barrel-to-credenza concept has a character that ordinary straight-sided console tables rarely offer. The key to modifying it responsibly is to preserve that striking shape while giving the connections, finish, and stability the same attention as the appearance.